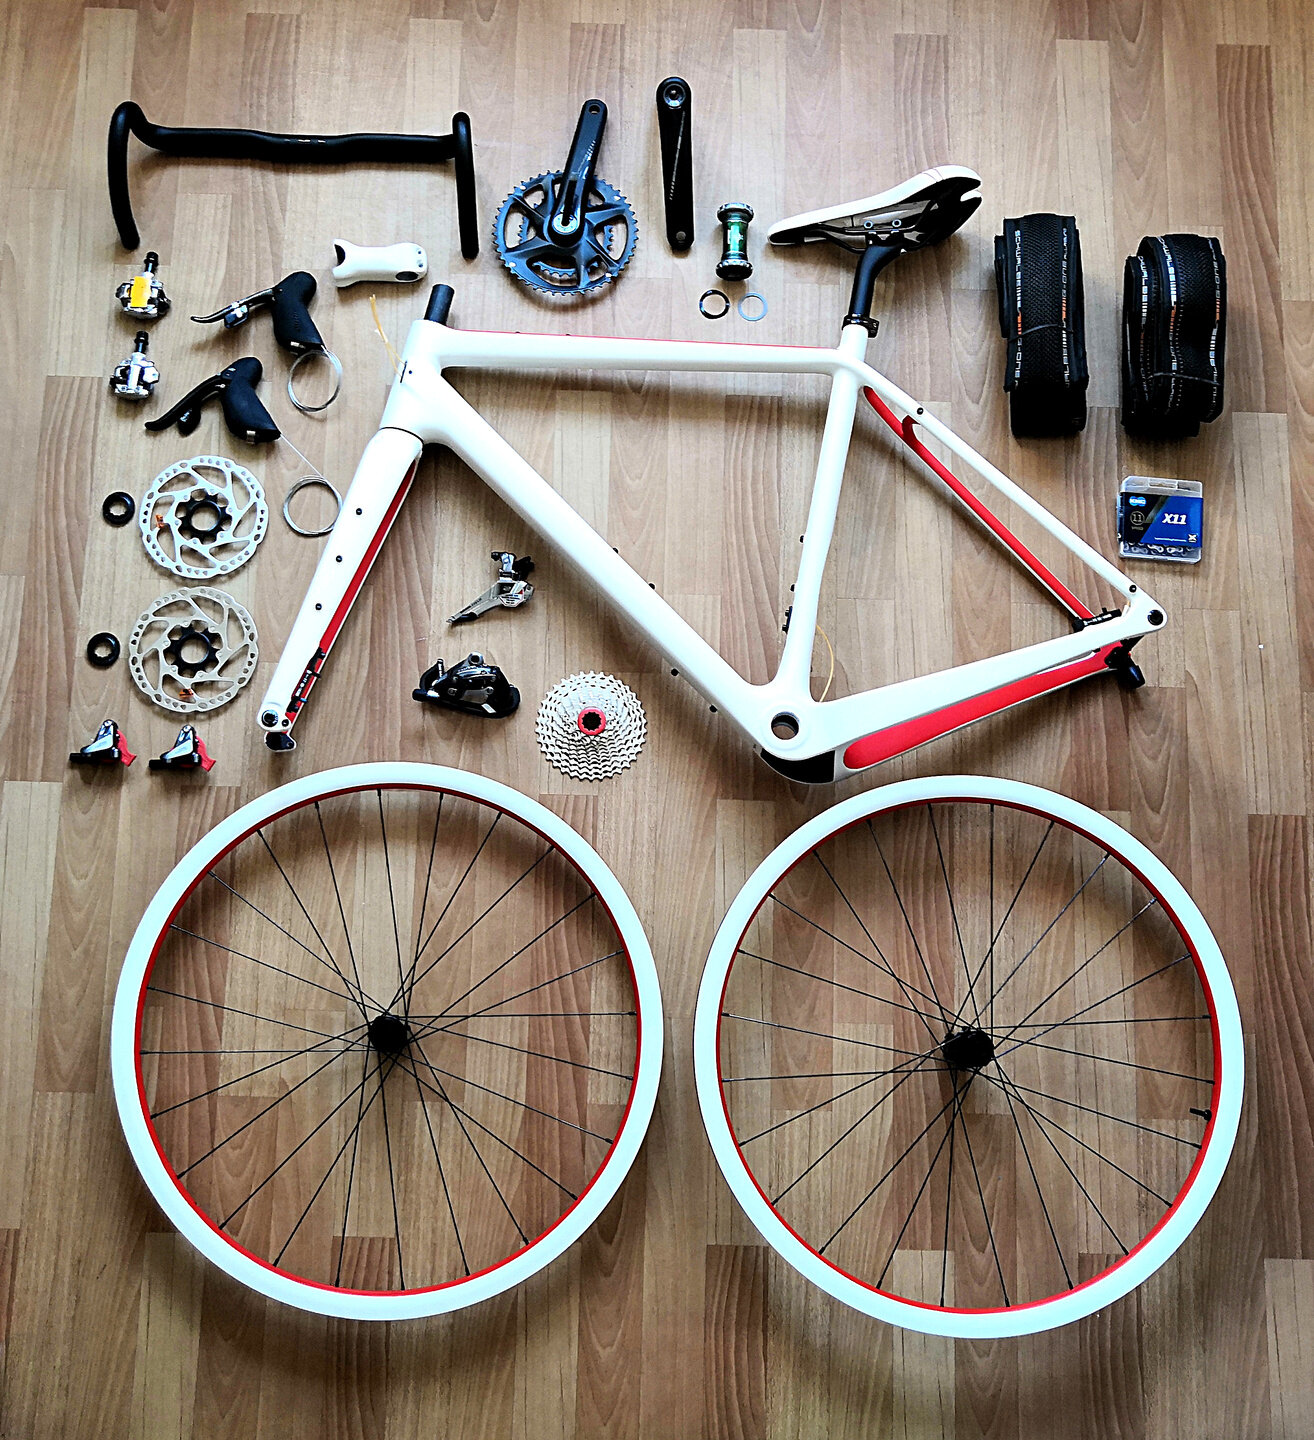
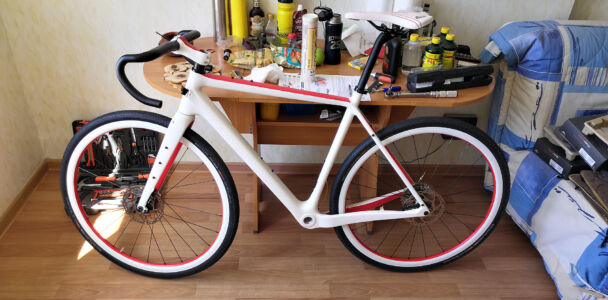
All the components are on hand, the wheels are assembled, which means that I can start assembling the bike.

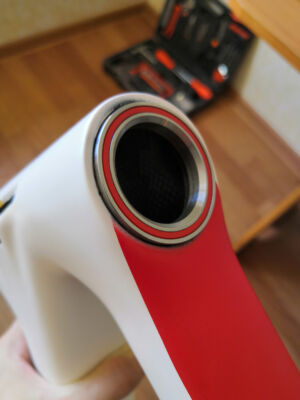
Before starting assembly, I shortened the steerer tube. Factories make steerer tubes with extra length. I decided to roughly trim the excess before the fork was mounted on the bike. I left enough length to fit a stem with a couple of high spacer rings. I planned to assemble the bike like this, and then go for a ride, adding different spacer rings to find the optimal handlebar height for me. After that, I planned to cut off the remaining surplus already qualitatively.
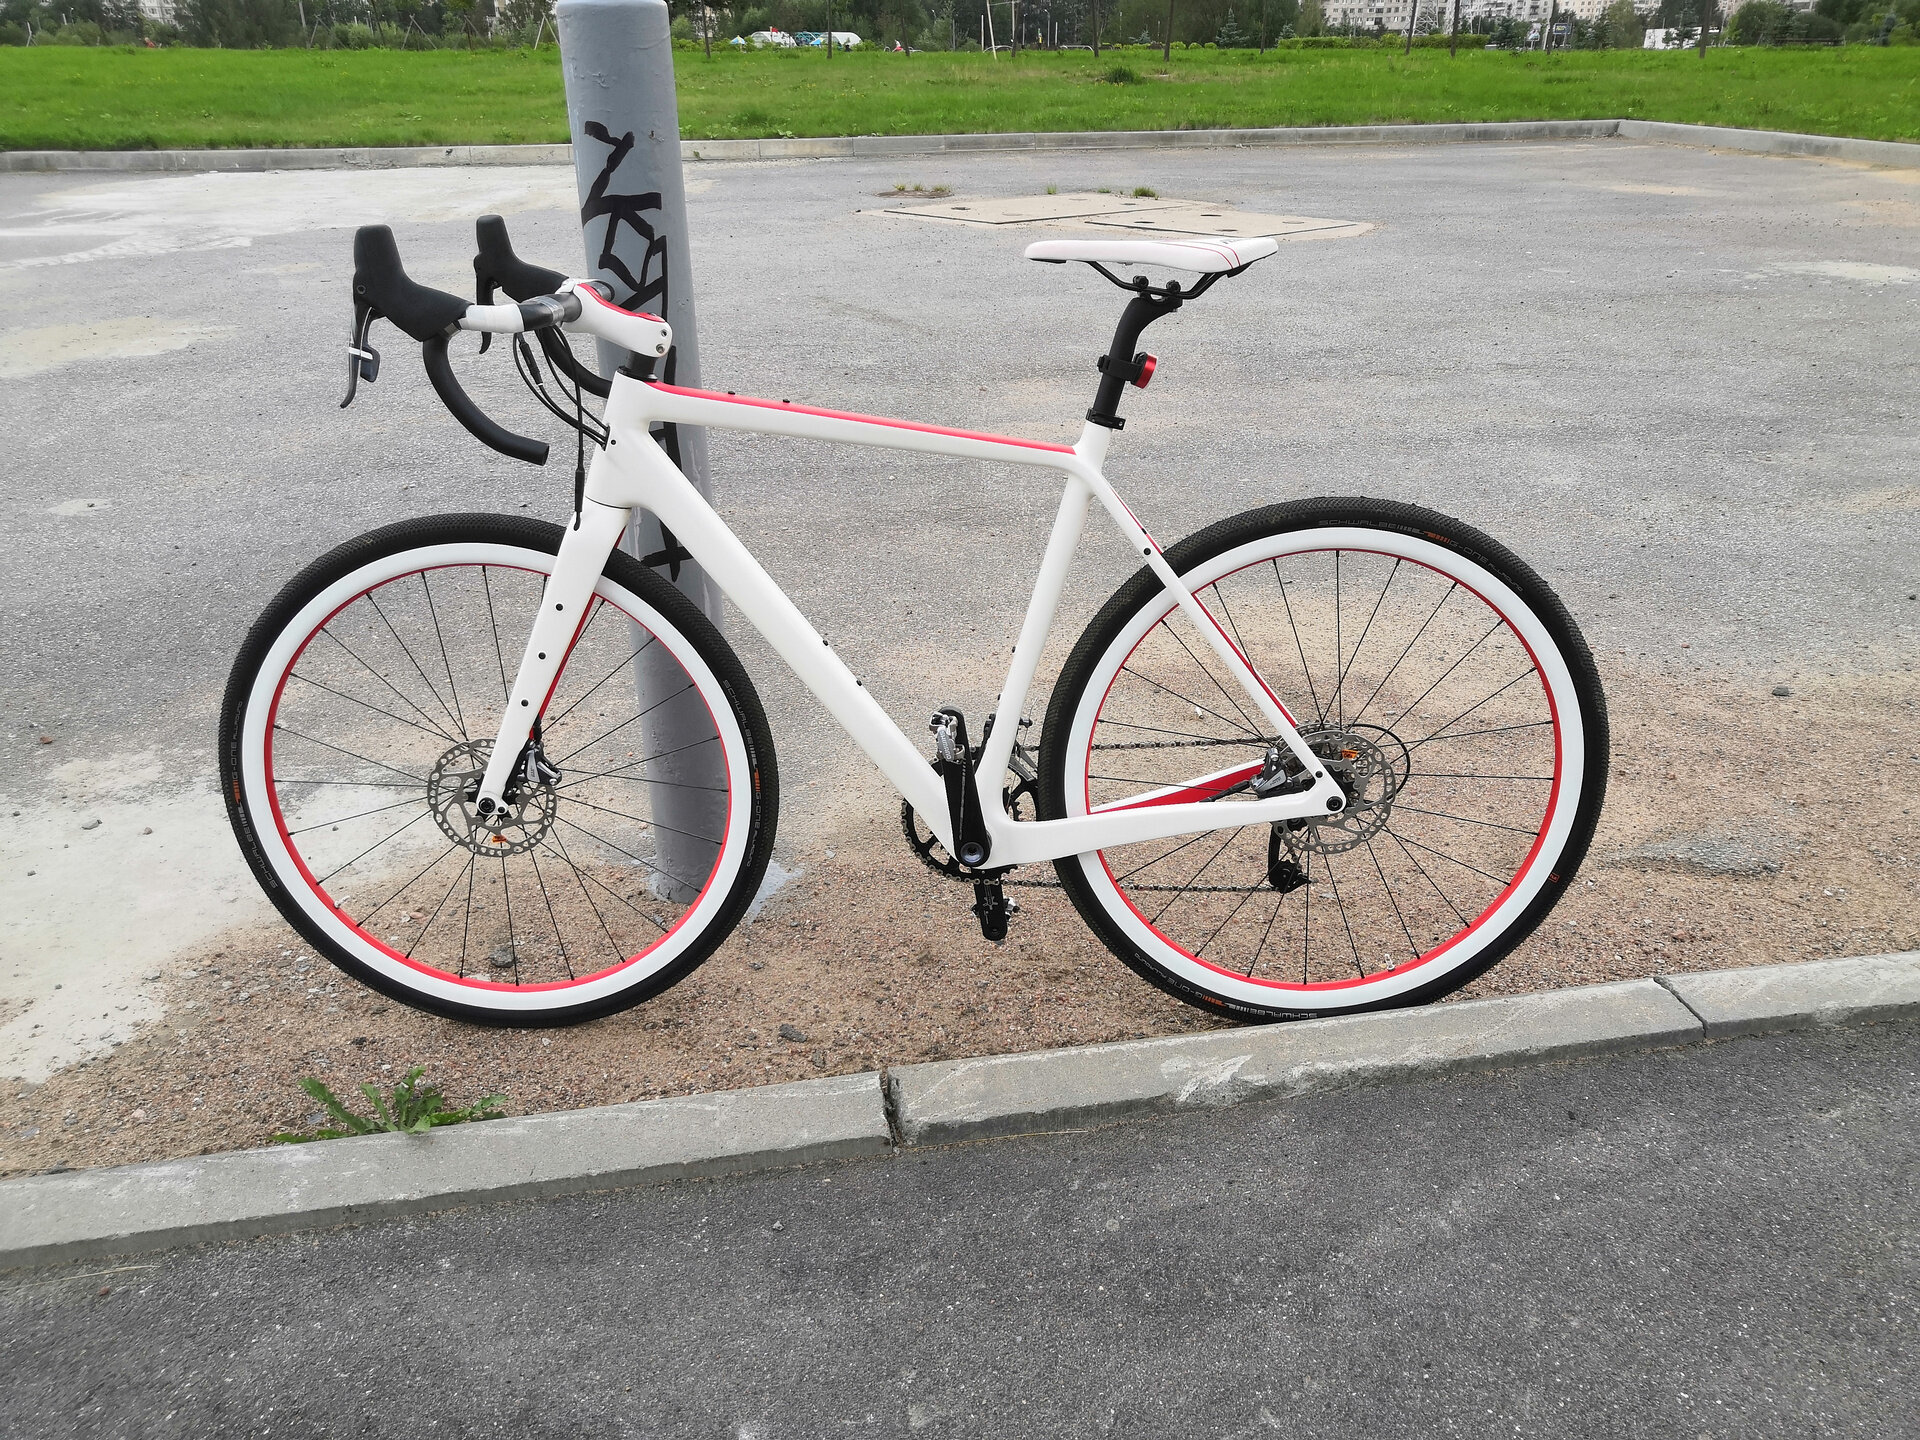
First stage of assembly
I started the assembly. The first thing to install is the wheels. However, I attached the saddle first. This allows the frame to stand comfortably on the floor upside down with the fork removed. I put the brake rotors on the wheels, then installed the wheels themselves in place. Nothing complicated here. I put the lower bearing onto the steerer tube, and then put it in the head tube. Now the bike could stand on its two wheels.


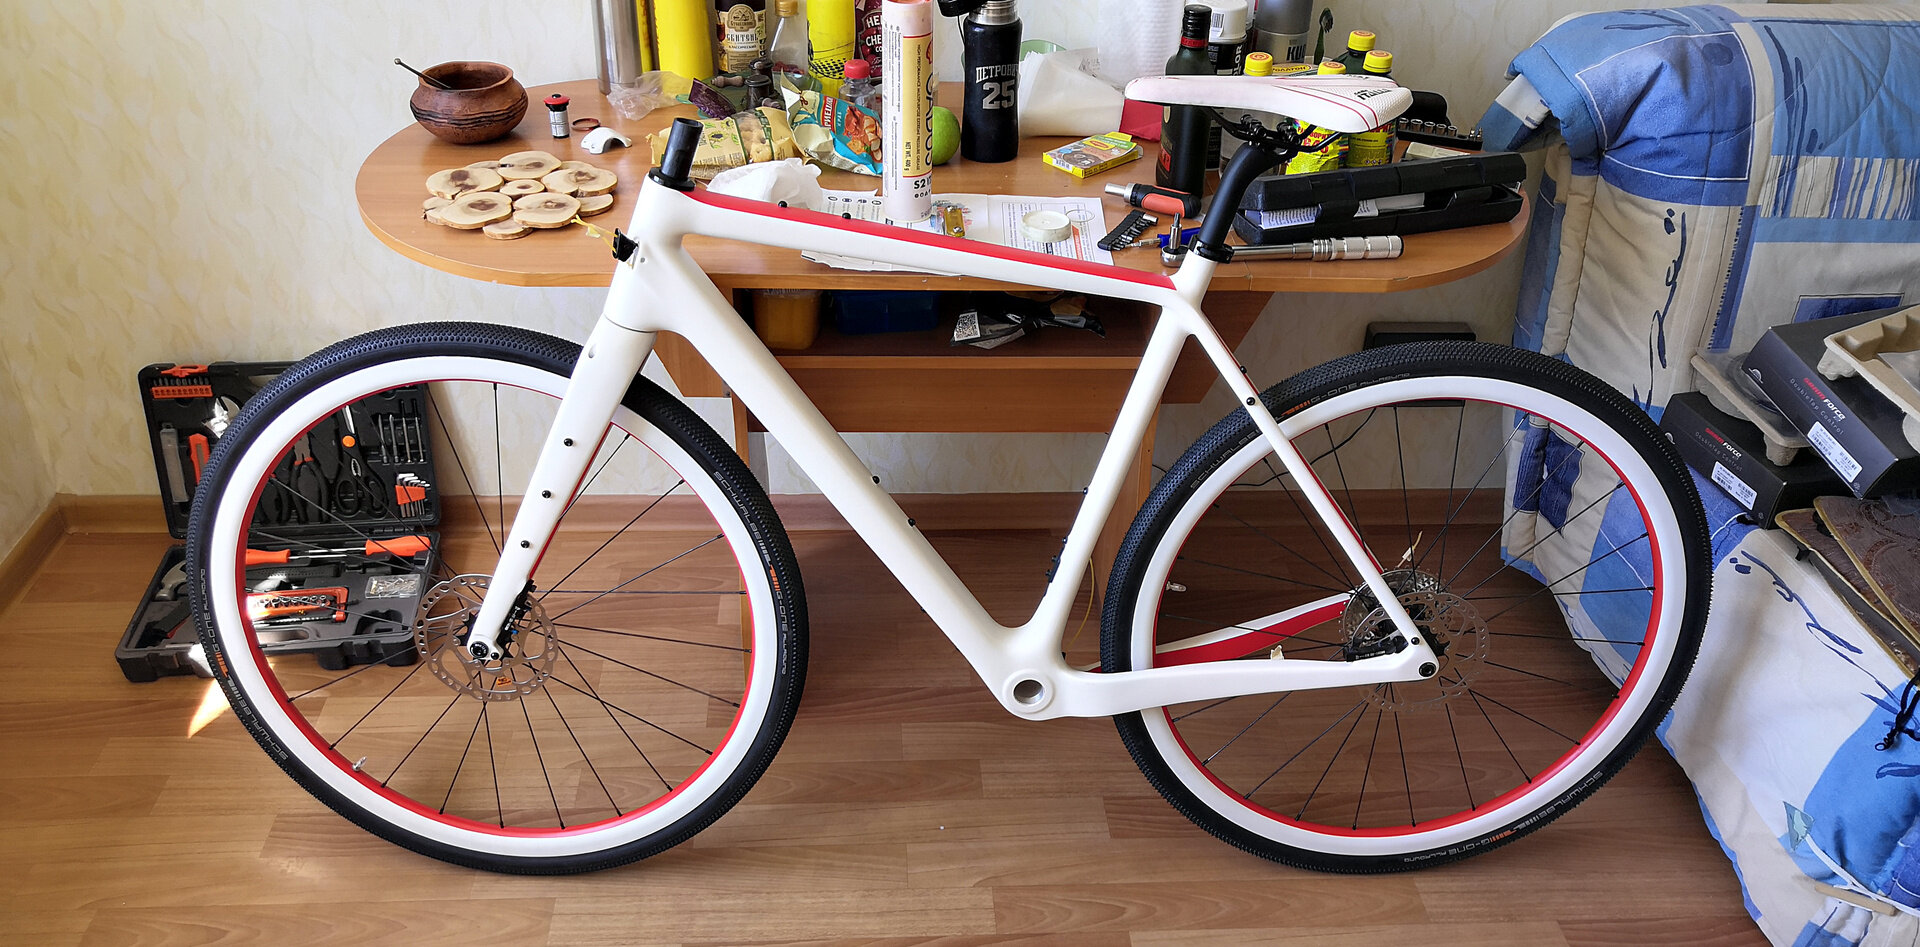

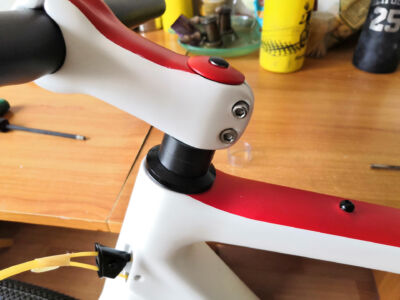
Then I set the stem. At the same time, I added two high spacer rings so that the stem did not stick out, and it was possible to install a compression plug clearly. Next, I installed the handlebar. I tightened the bolts loosely since adjustment will be required. However, even with a weak tightening, the paint on the stem cracked at the point of contact with the bolts 😢 And this is after so much time spent on dyeing.


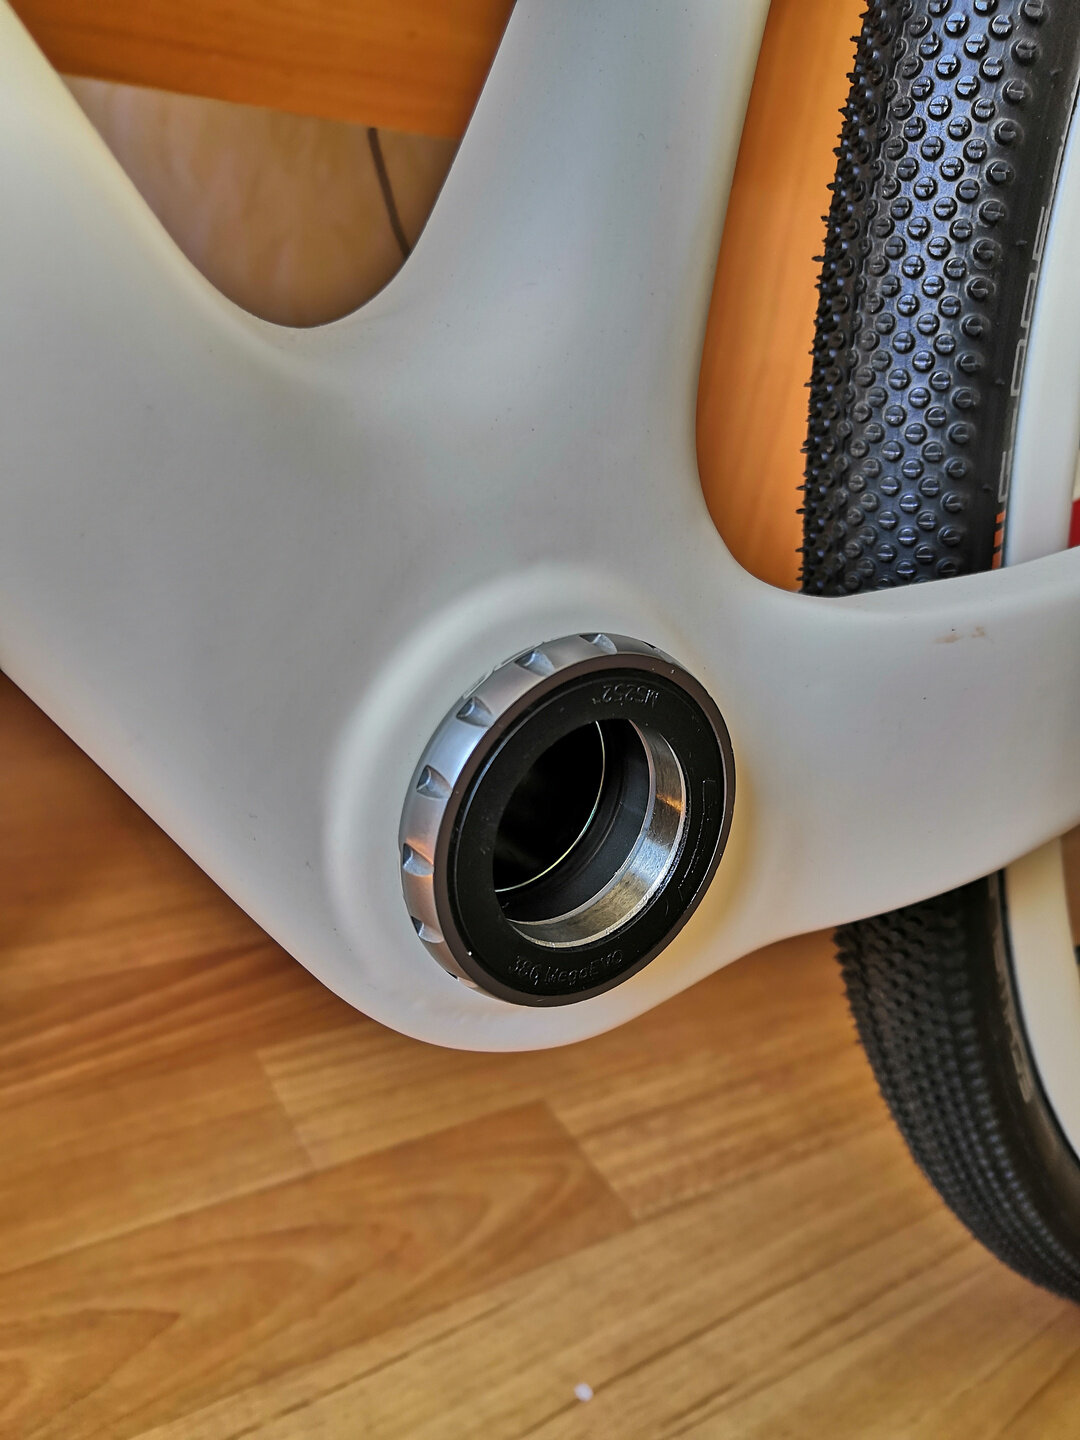
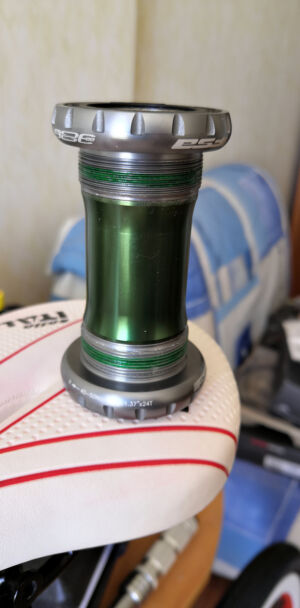
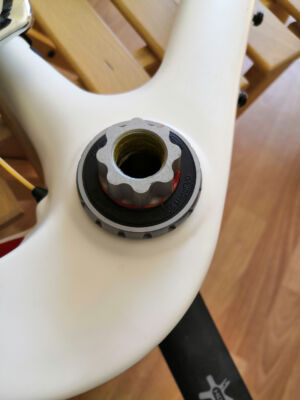
Now the bottom bracket should be installed. I read that it would be good to pre-lubricate the bb shell from the inside (completely) to protect it from corrosion in case of water ingress since water dries out from here for a long time. I did just that. The bottom bracket itself was screwed without much effort. I don’t have a special wrench for such a bb nut, so I tightened it with my hands as far as I could.


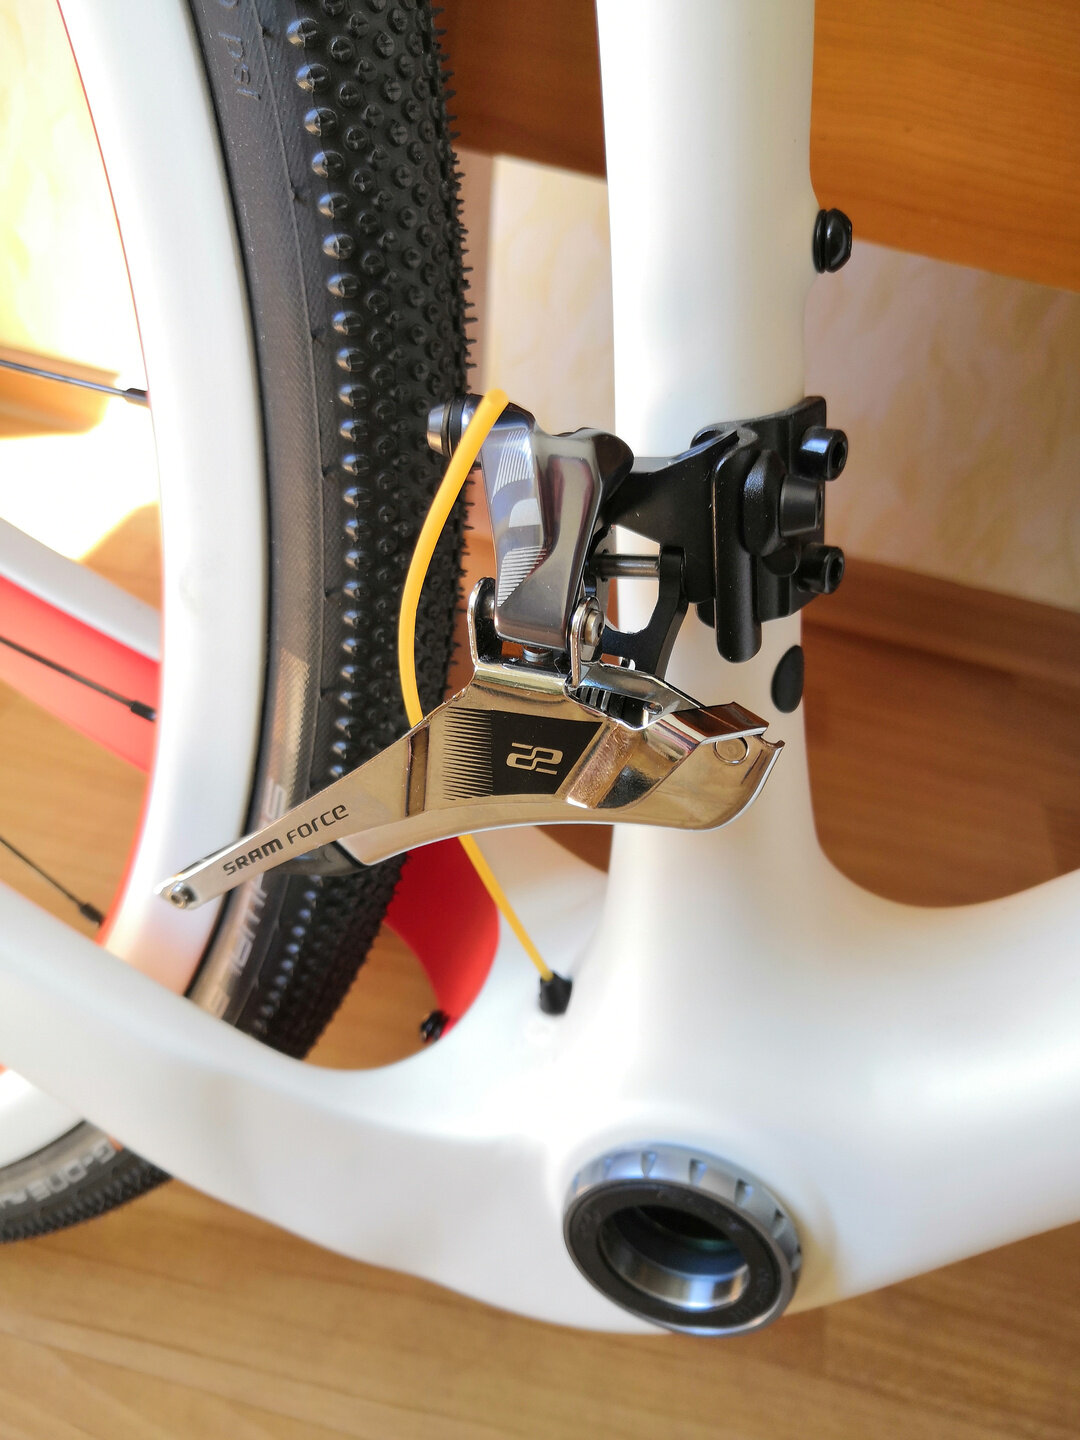
Before installing the chainrings, I installed the front derailleur. In general, there is no difference in what order to install them, but I thought that the chainrings would interfere.

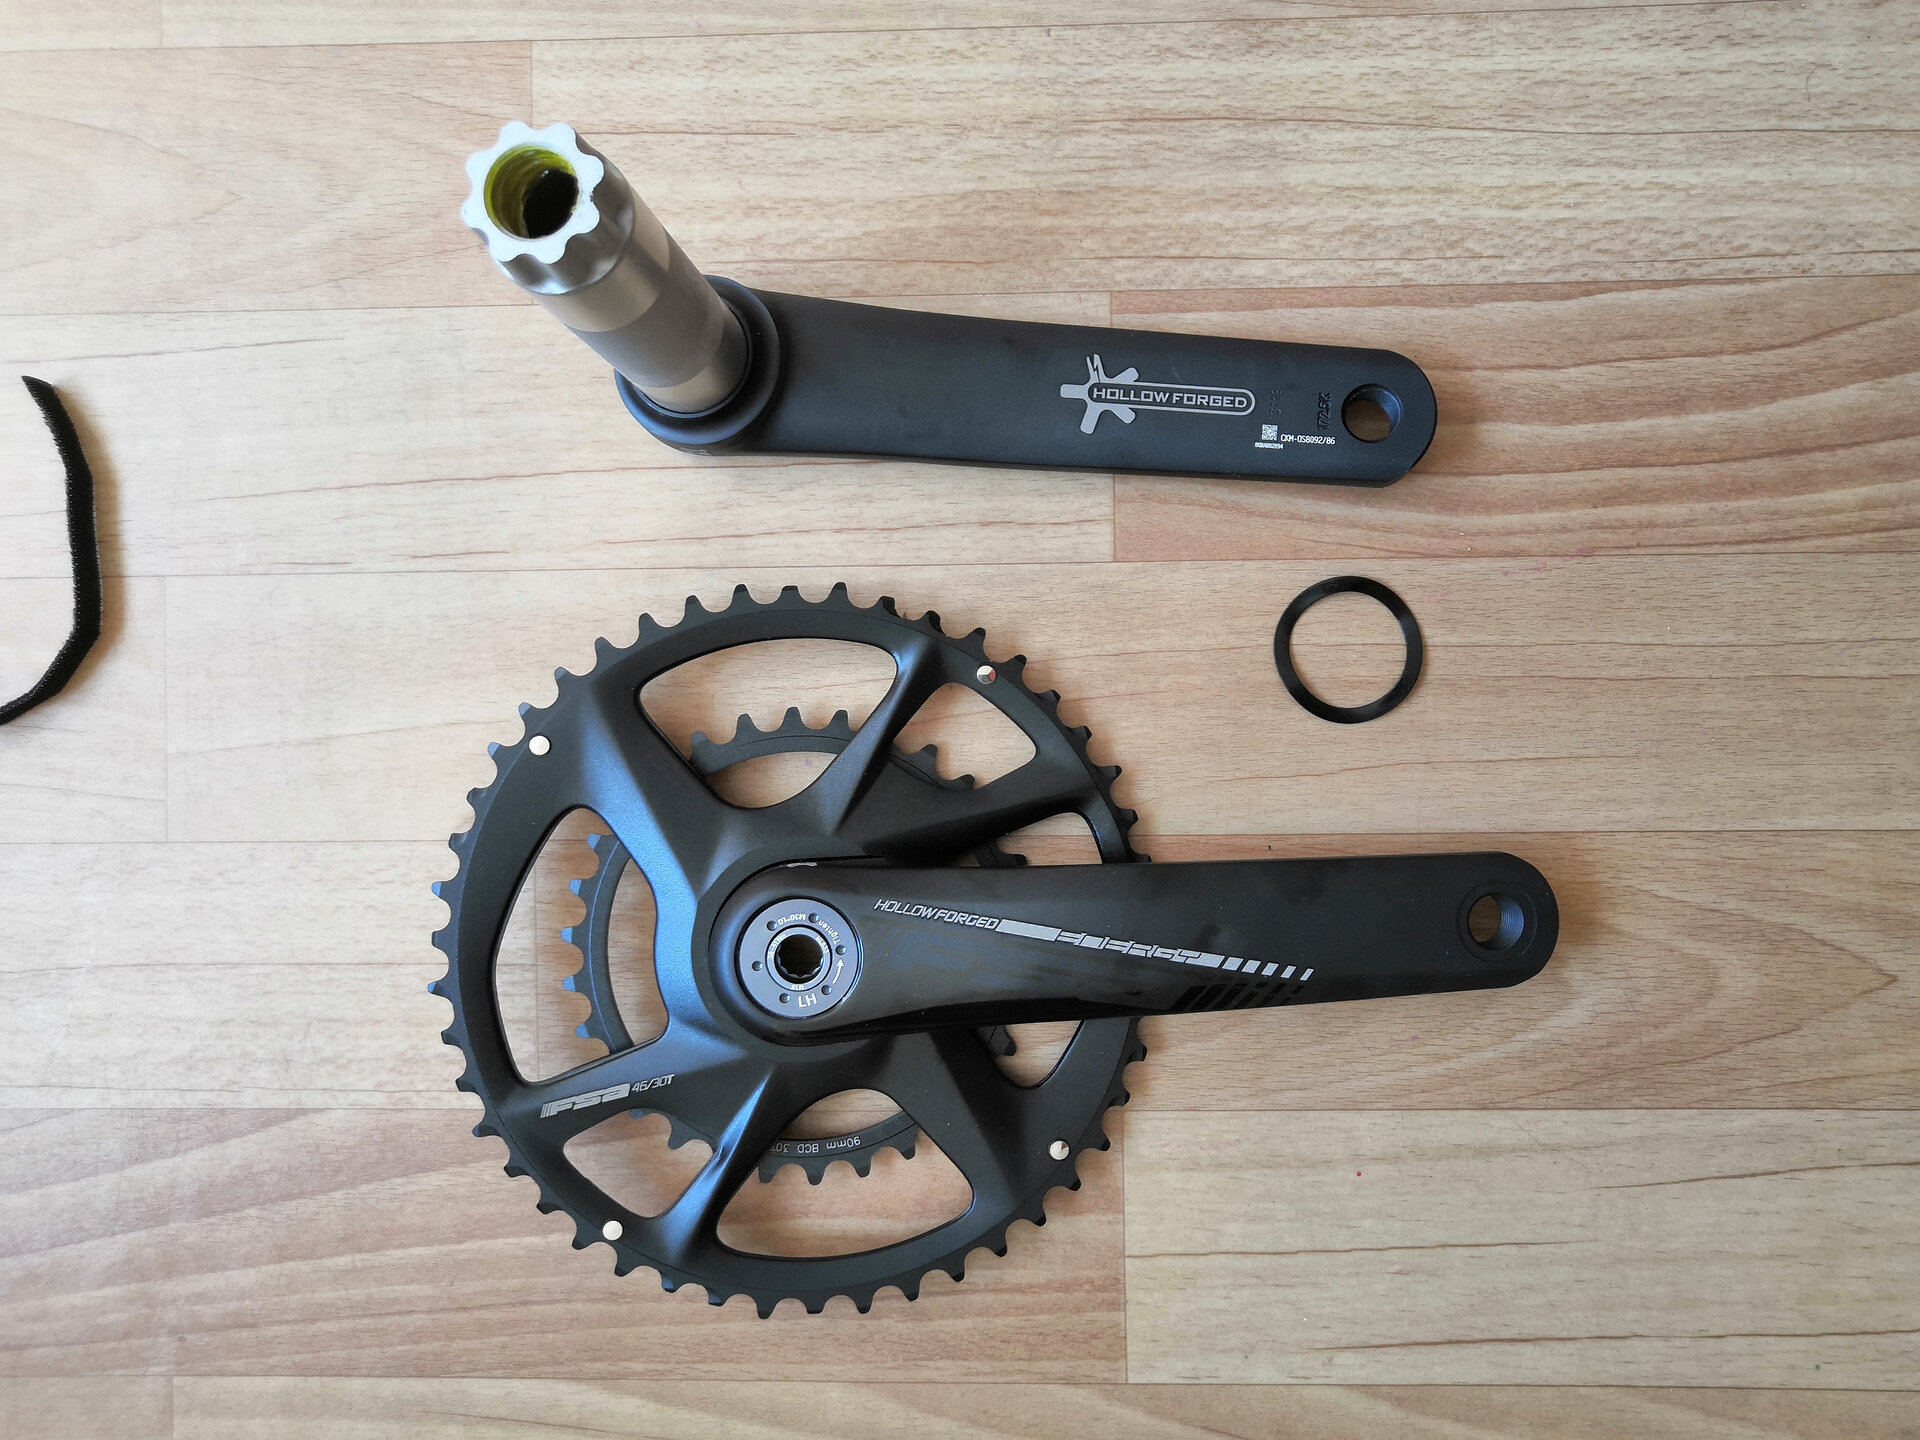
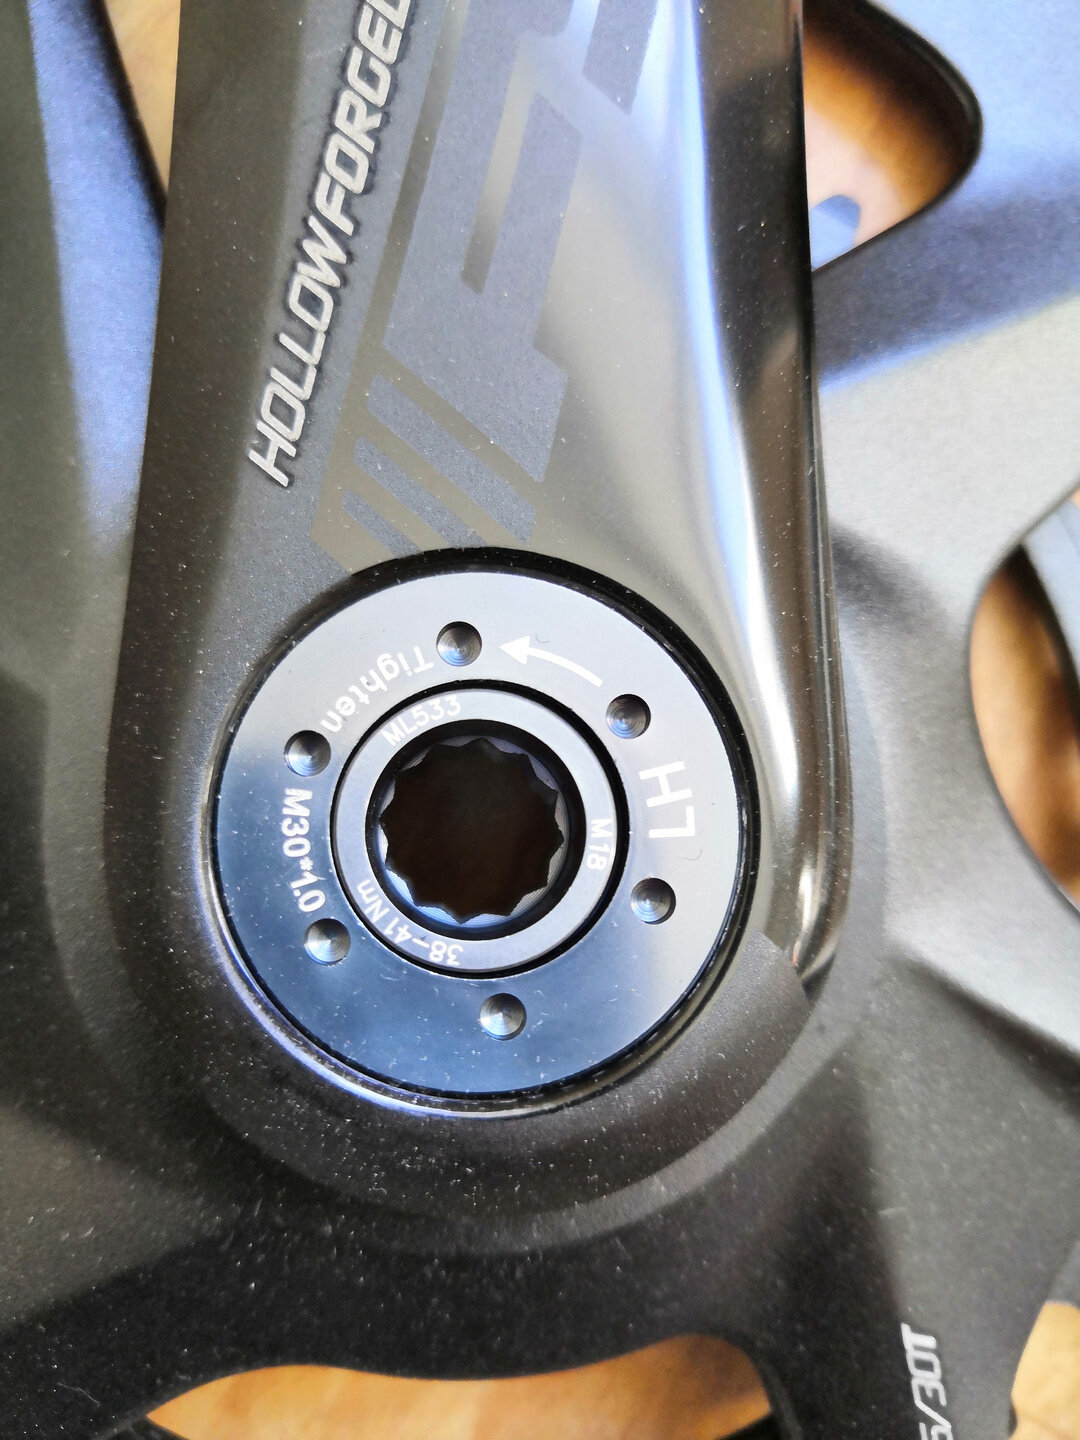
At first, I was confused by a wrench socket on the bottom bracket spindle. But then I realized that this is just a multi-way socket for a regular 10 mm hex wrench. The axle fit very tightly into the bottom bracket, even when I began to tighten cranks with a wrench, I had to make a lot of effort.

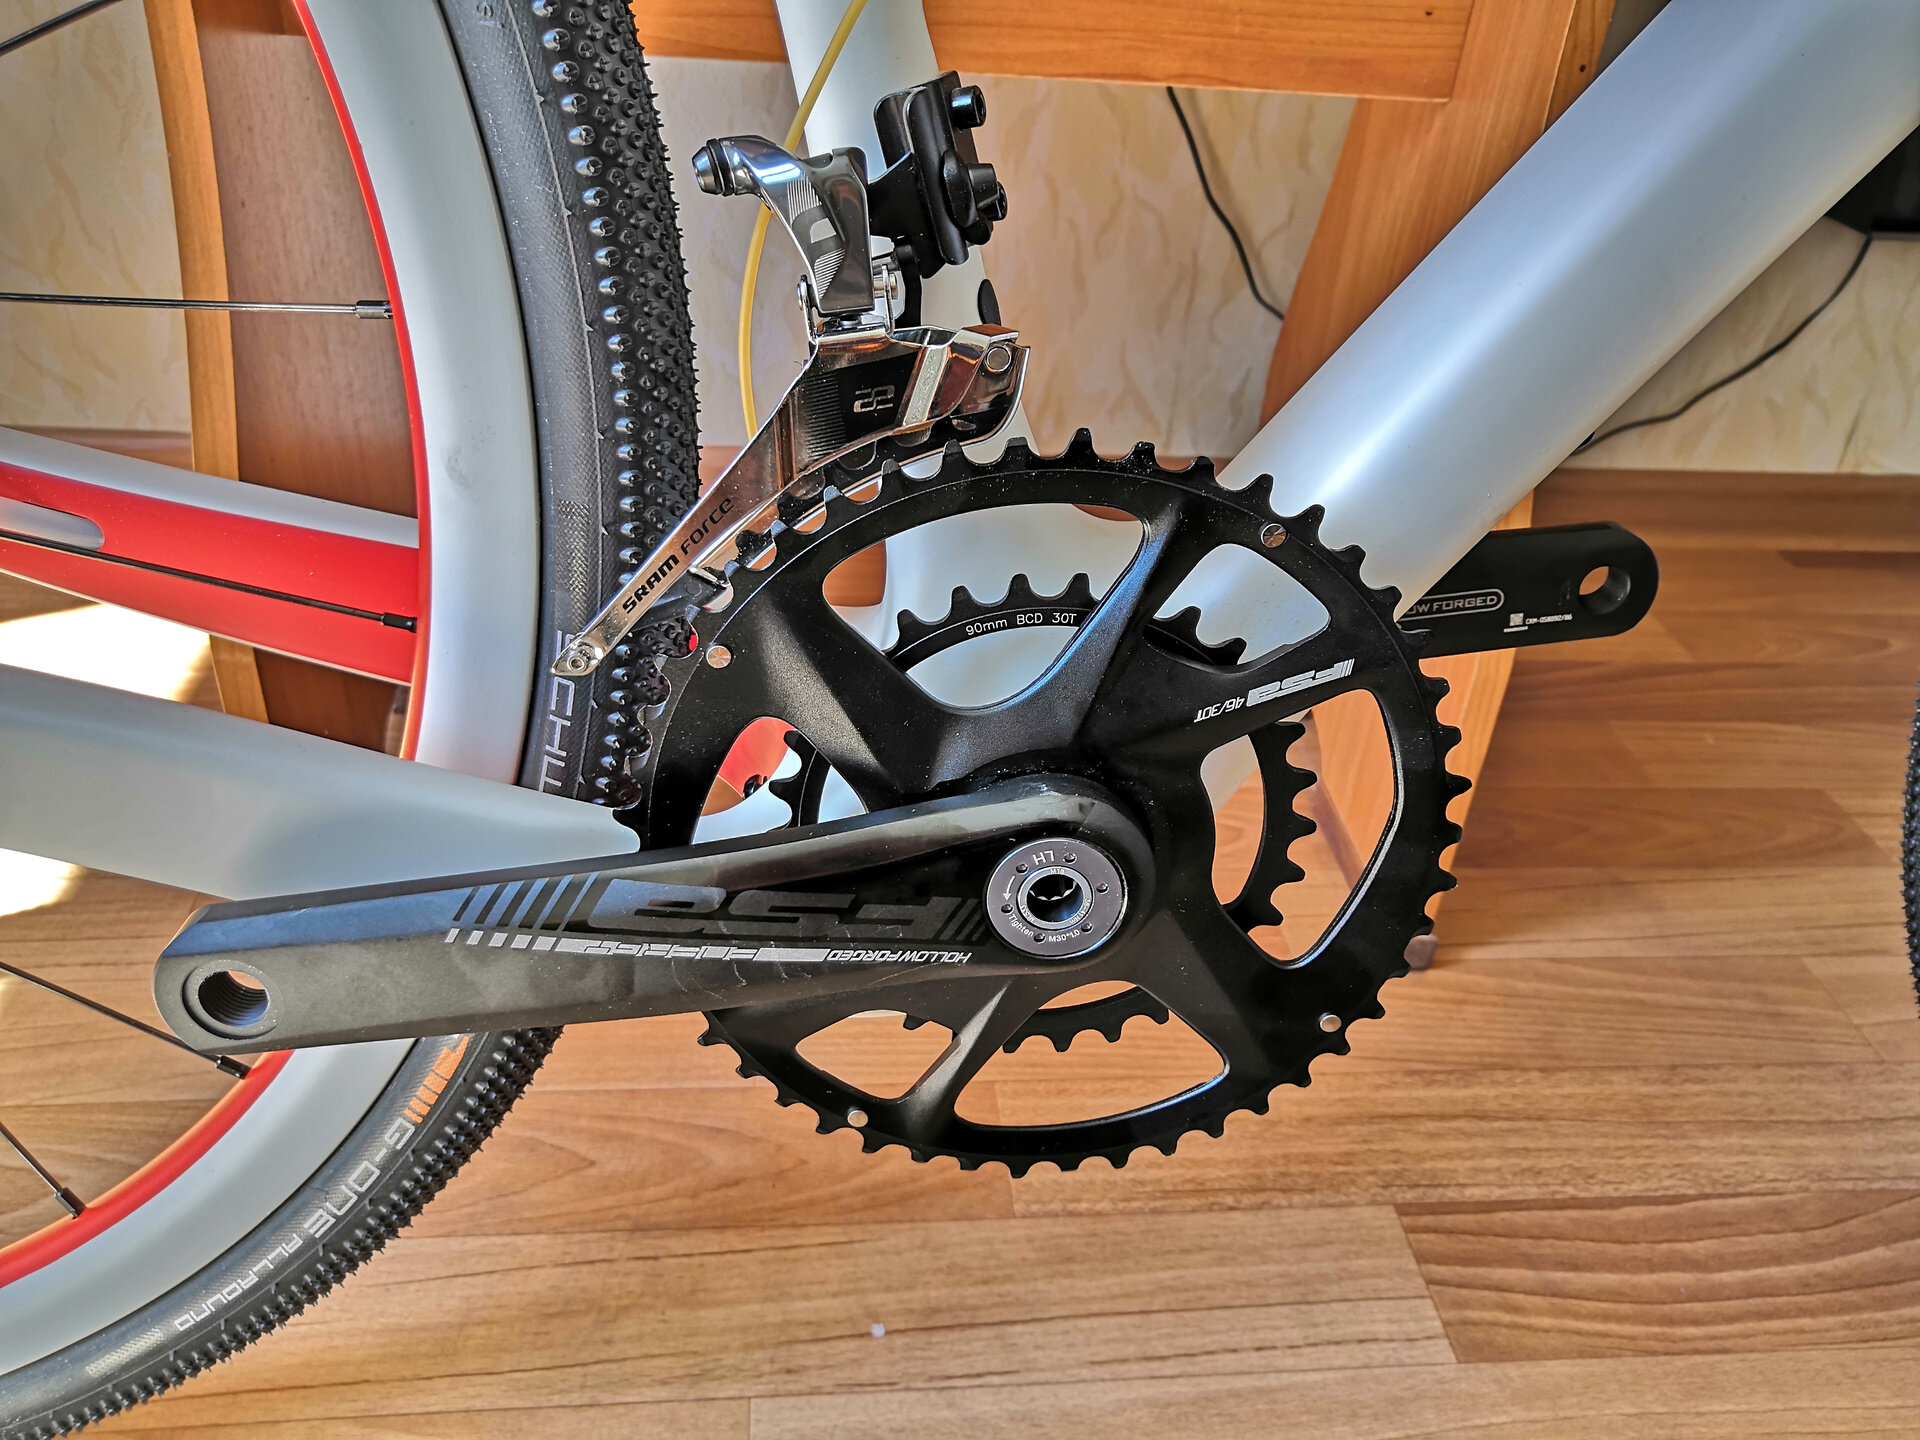


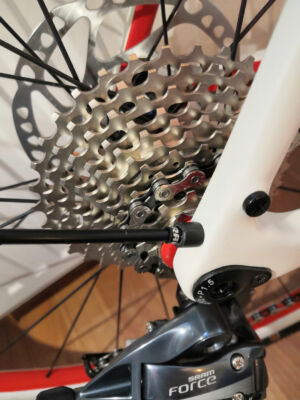
I installed the rear derailleur. I thought that the front derailleur could be adjusted at this stage, but after routing the cables, settings got lost.
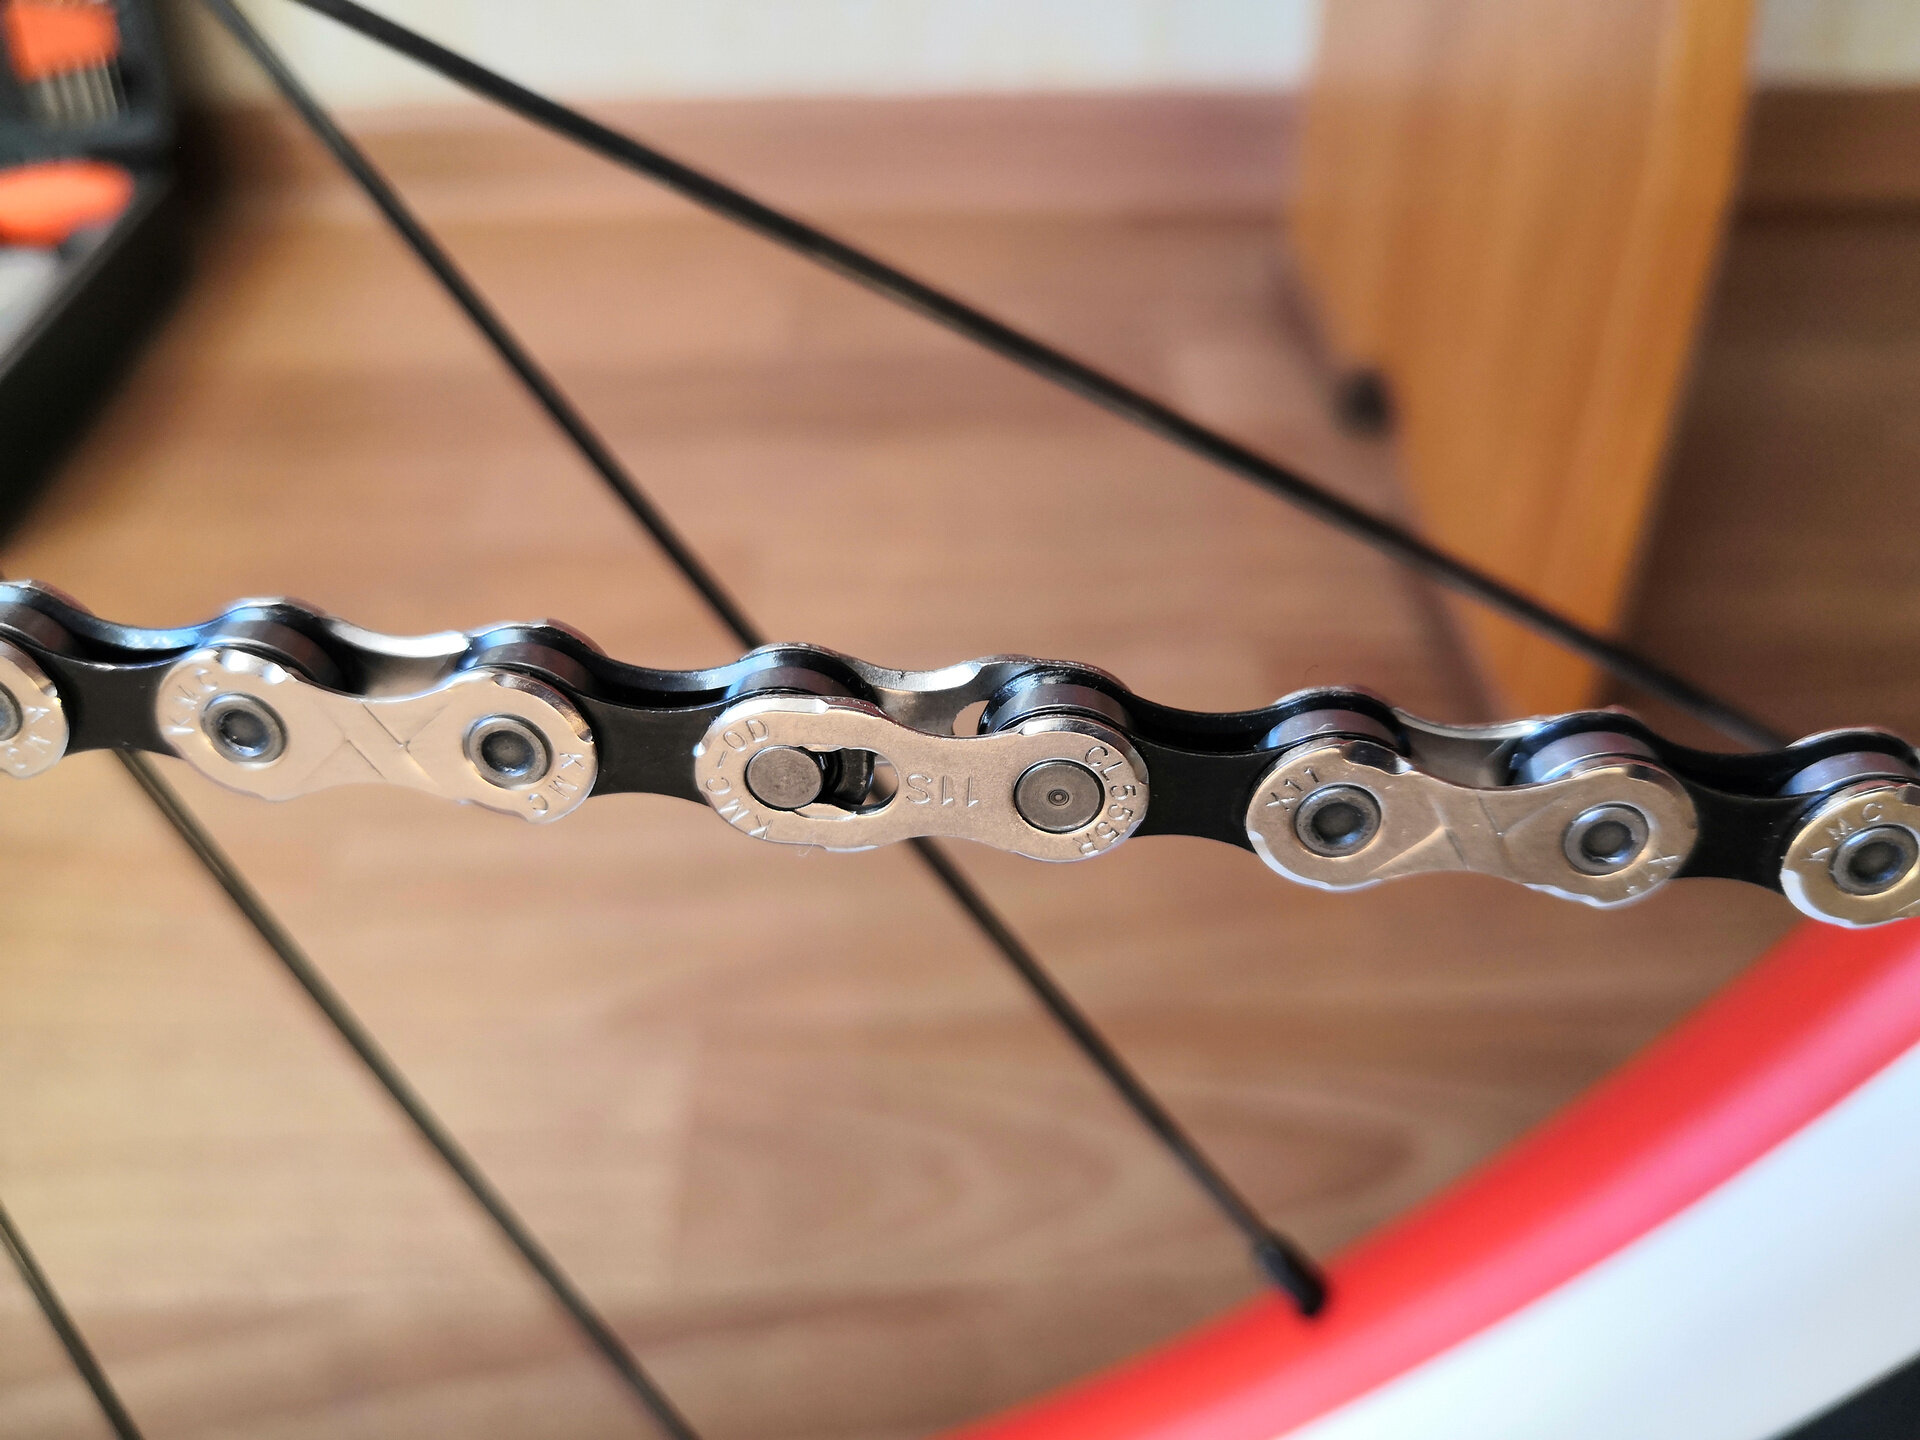
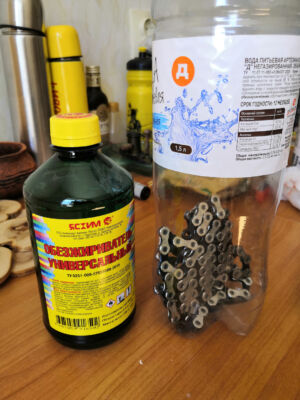
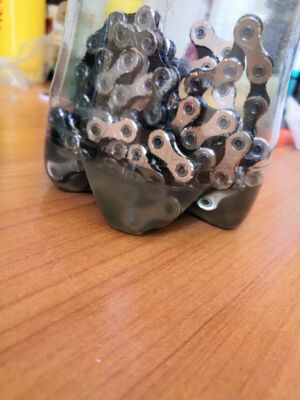
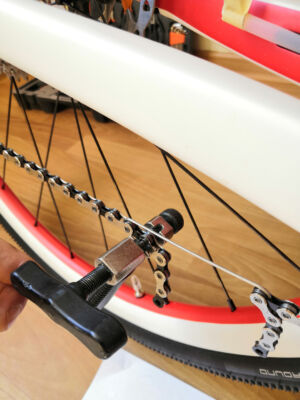
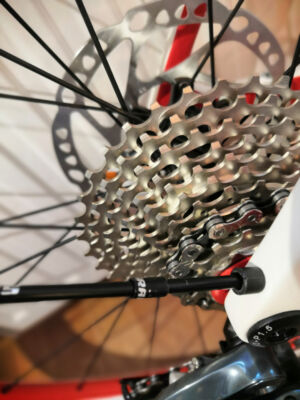
I washed the chain from the factory grease in a solvent. I was planning on using paraffin grease anyway, it cannot be applied to the oily chain. At the same time, working with the chain, I did not get dirty on it. I measured the required chain length and shortened it.


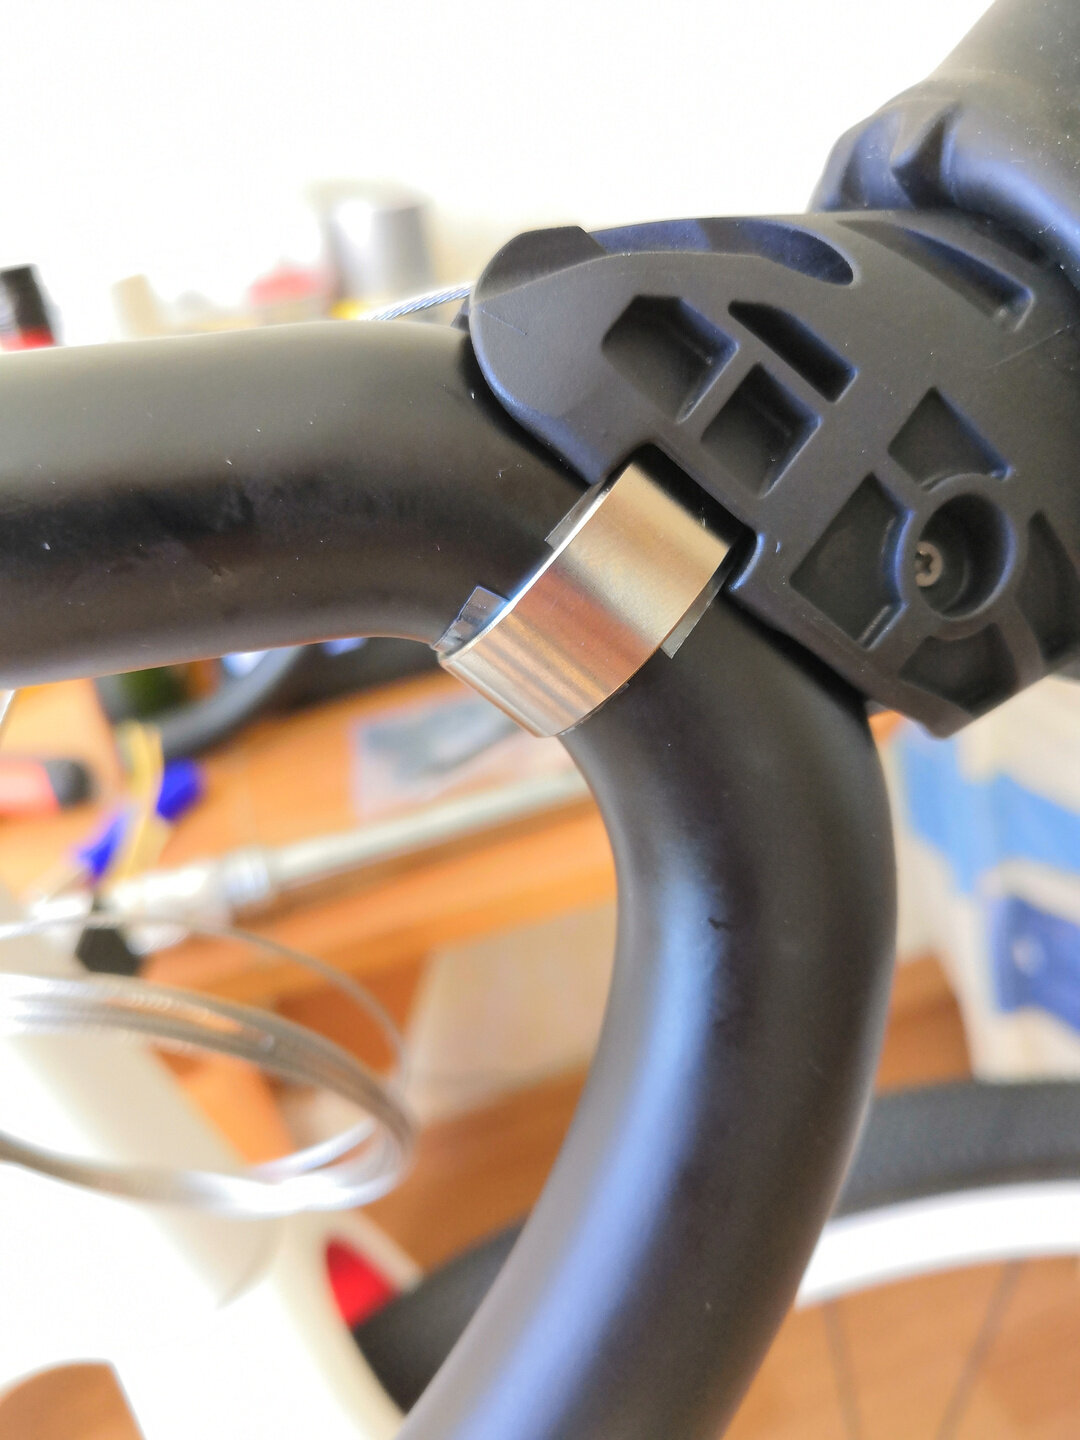
Then I installed the brake calipers. I set shifters on the handlebar. For some reason, I didn’t like the idea of tightening the metal ring of the shifter directly onto the carbon, so I put a plate cut from a plastic bottle. Actually, this is not necessary, I just had some kind of phobia that either the top layer of carbon would crack, or the shifters would slip.

The time has come for the most difficult part – routing the cables and hydraulic hoses. And then I realized the greatest failure that I made.
Buying new shifters
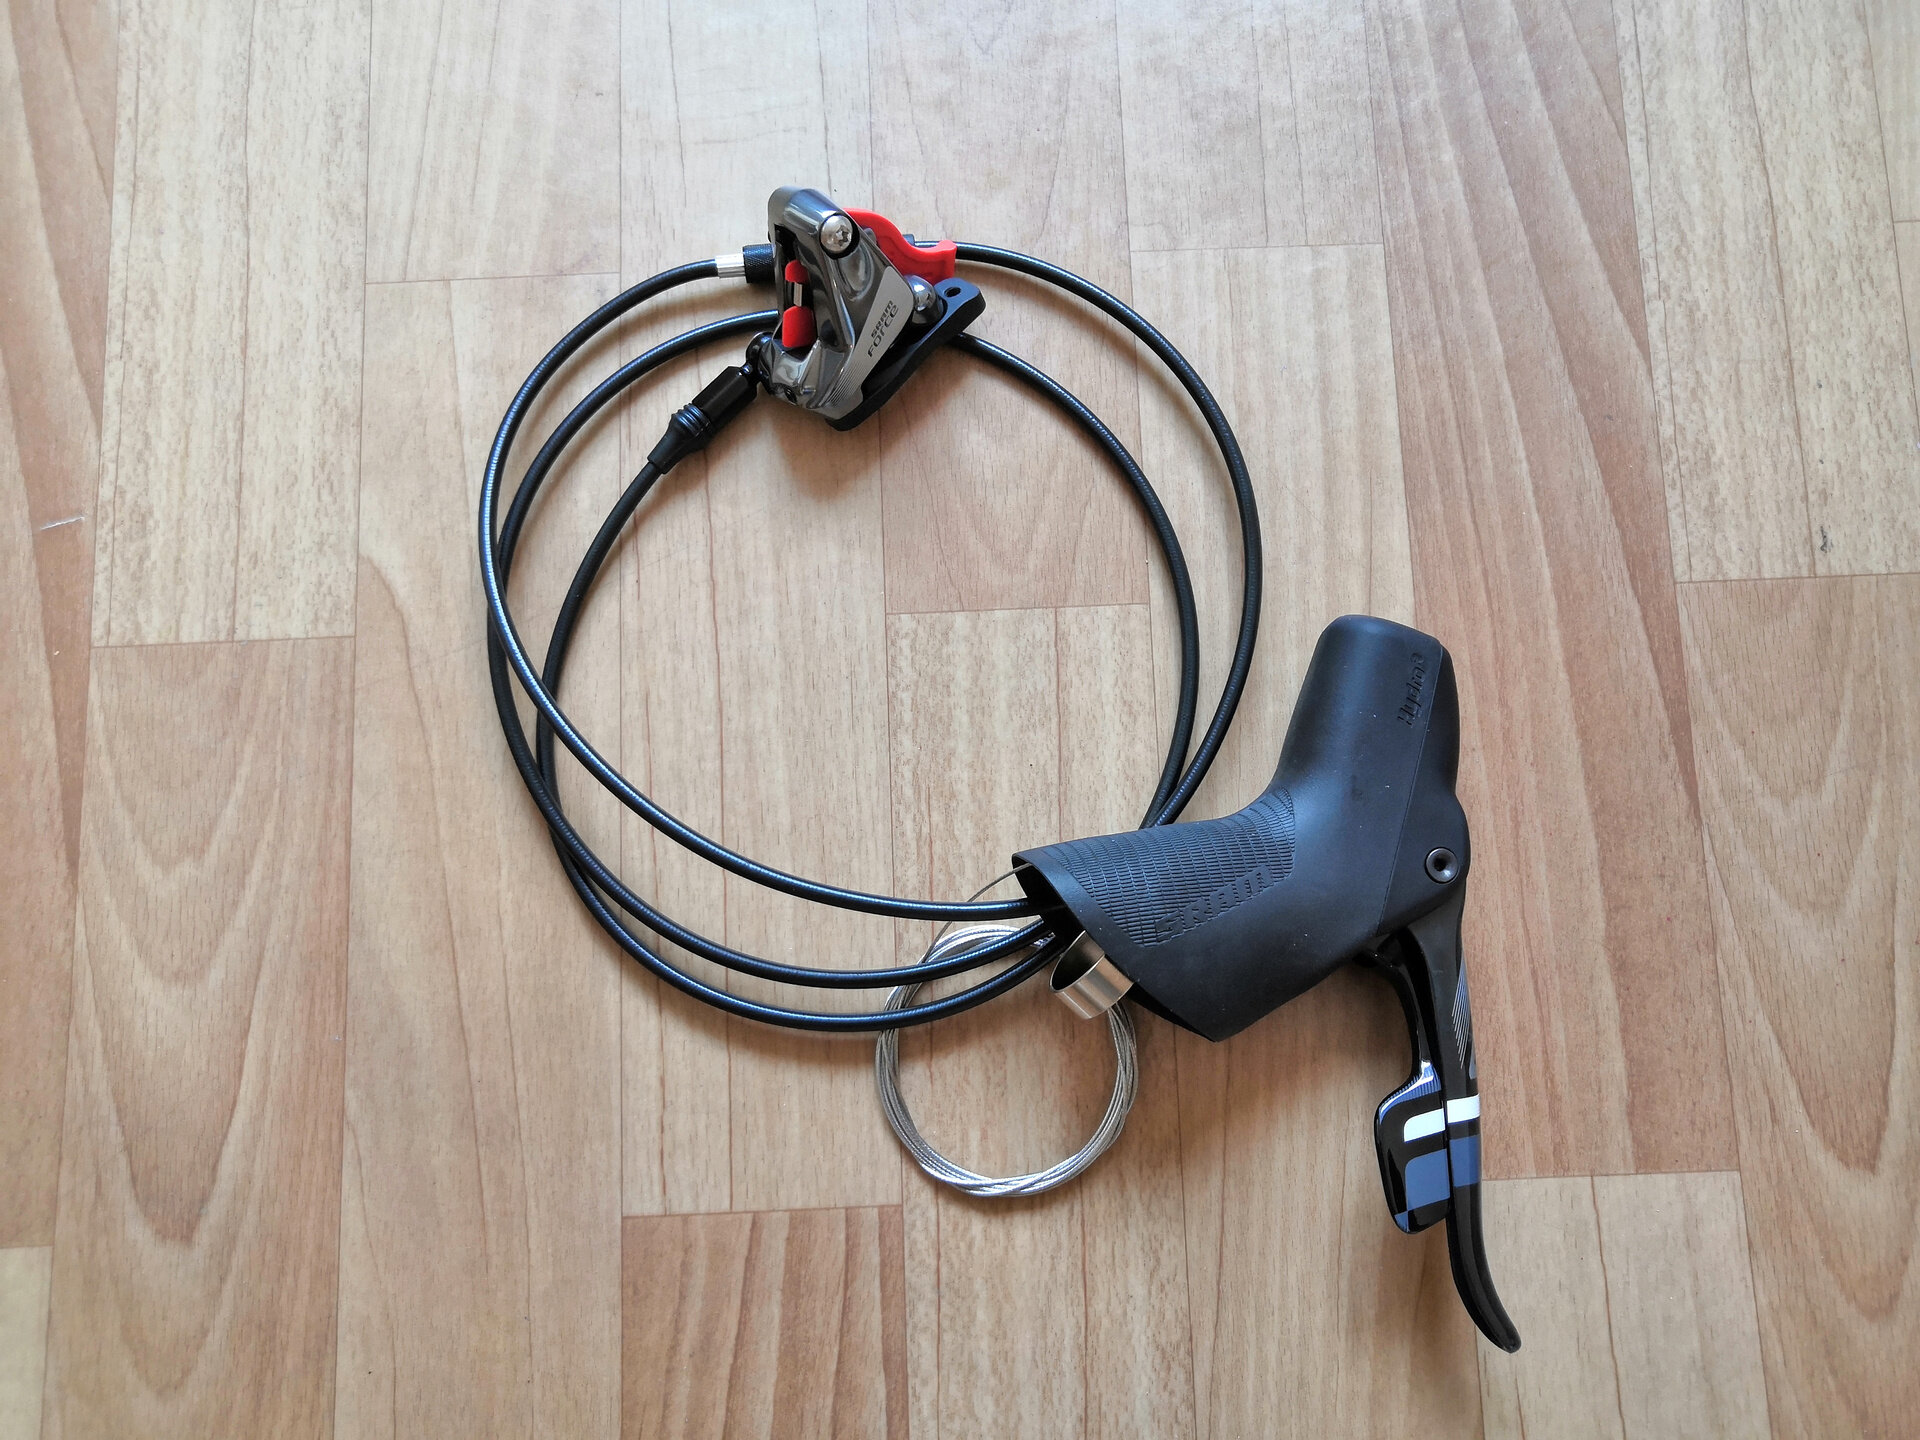
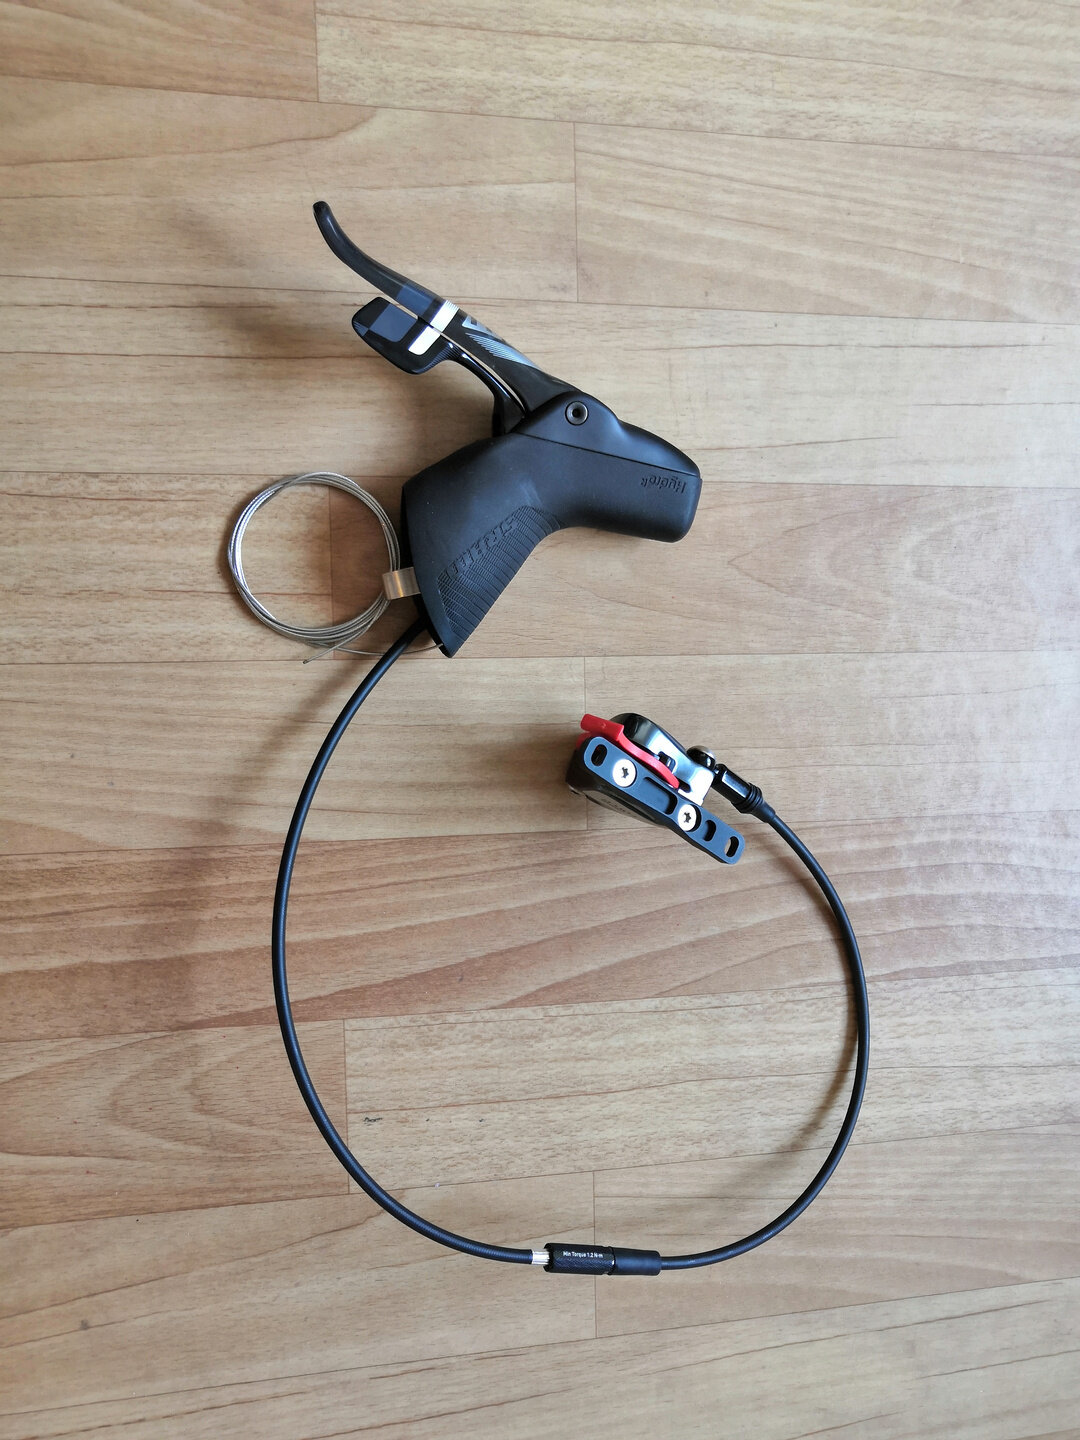
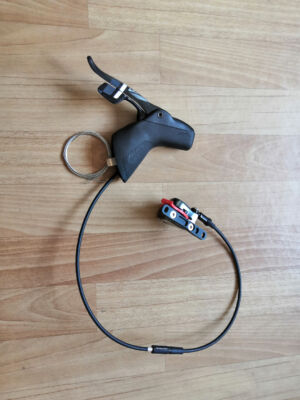
Examining the shifter, I could not understand how to install the hydraulic hose in it. And then I realized that I bought mechanical shifters 😧 Up to this point, I thought that the Sram Force lineup only contains hydraulic systems, because there are not even mechanical disc brakes (I completely forgot about the existence of a V-brake). And even after seeing mechanical in the description, I was sure that it is about gear shifting, which means mechanical and not electronic. Eventually, this led to the loss of a lot of money 💸 I don’t know if there are still people who have made the same mistake, but this is very shame!
There were two solutions to this situation: buy hydraulic shifters or buy mechanical calipers (not necessarily Sram). I didn’t want to bear with the mechanics, I decided to follow the primary plan and look for hydraulics.
Here Sram has prepared an incredible meanness. As it turns out, they don’t sell hydraulic shifters separately. Nowhere and no one has them. They sell them only as an assembled set (shifter, hydraulic hose, brake caliper, and all this is already bled and sealed). I had no choice, I had to buy a complete assembly. It turns out that I also lost money on the brake calipers because I also bought them separately. I was lucky though, I came across OEM packaging (that is, packed not in branded boxes) on bike-components.de, for such a product there was a discount of something about 40%.

Continuation of assembling
I installed hydraulic shifters on the handlebar. But I have internal hose routing both in the fork and in the frame, how do I route the already sealed hydraulic system?
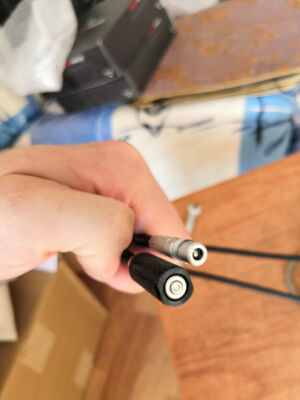
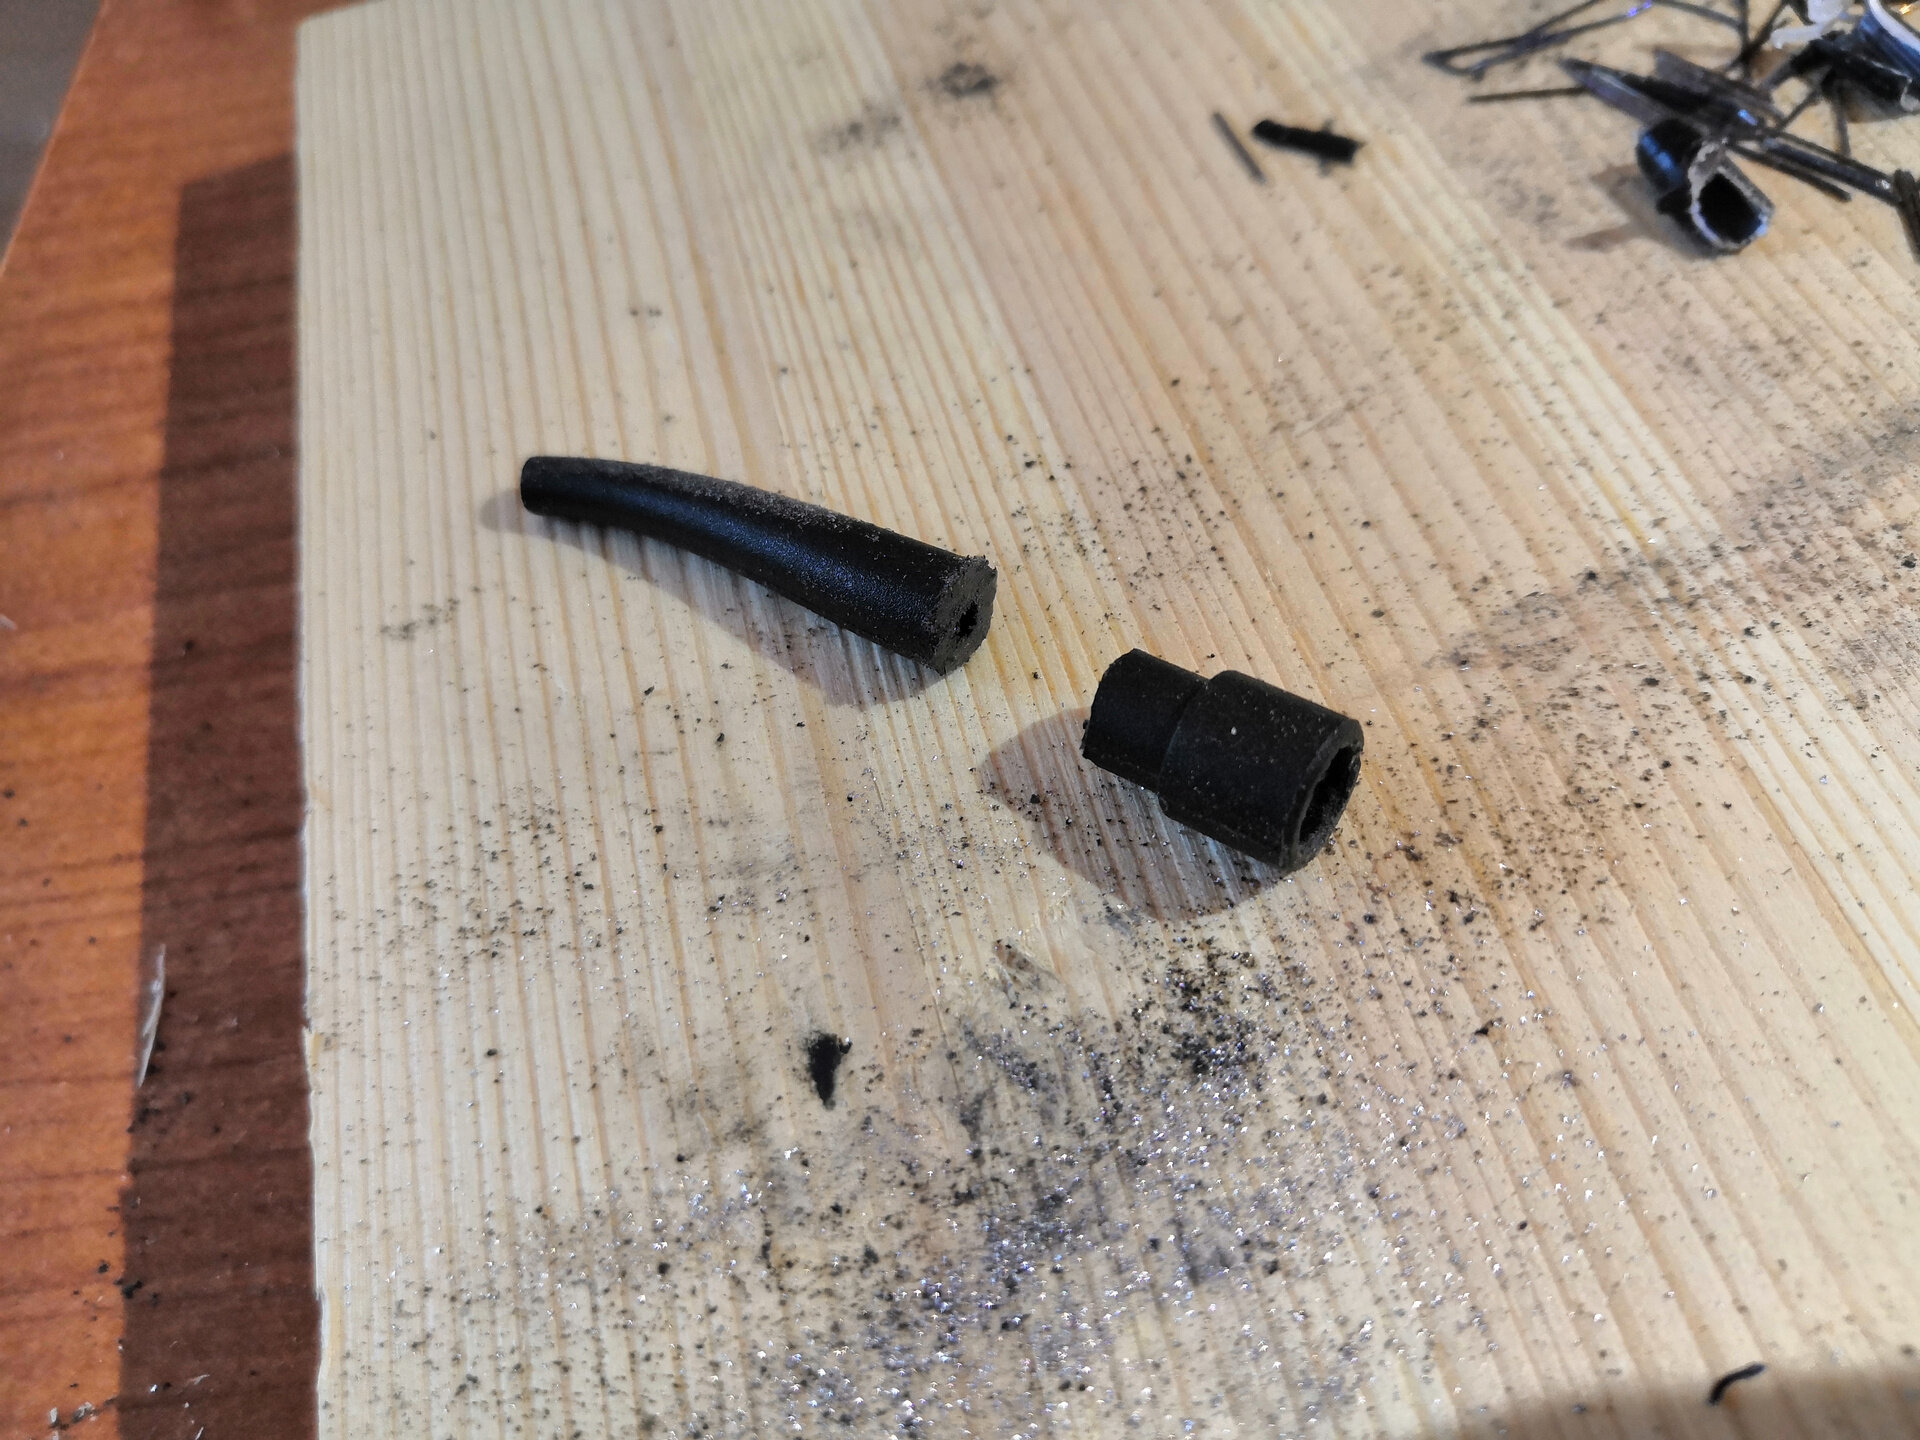
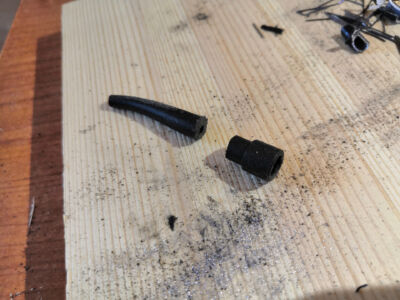
They have a very clever demountable gateway on the hydraulic hose. The gateway is unscrewed and sealed at both ends with spring-loaded balls.

I put the front hose through the fork. I connected the gateway, everything worked, but the hydraulic hose itself turned out to be short, a little lacking to lay it along the handlebar as I desired. Not critical, but still unpleasant.
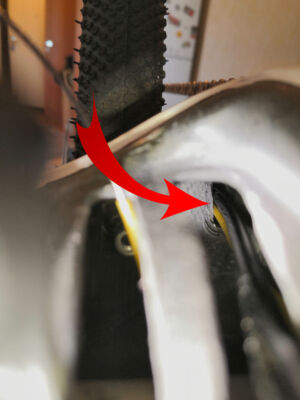
But there was a problem with the rear brake. If this were a normal system, where everything is disassembled, then I would simply route the hose through the guide tube that was laid inside the frame, and then sealed at both ends. But here, after all, the half of the gateway is at the end, it does not fit into the tube. I taped the end of the gateway to the guide tube coming out of the chainstay. I began to pull the tube from another end, inside the chainstay this mess passed, however, at the bend of the chainstay near the bb shell, this huge piece of gateway could not get through, no matter how I tried 😞
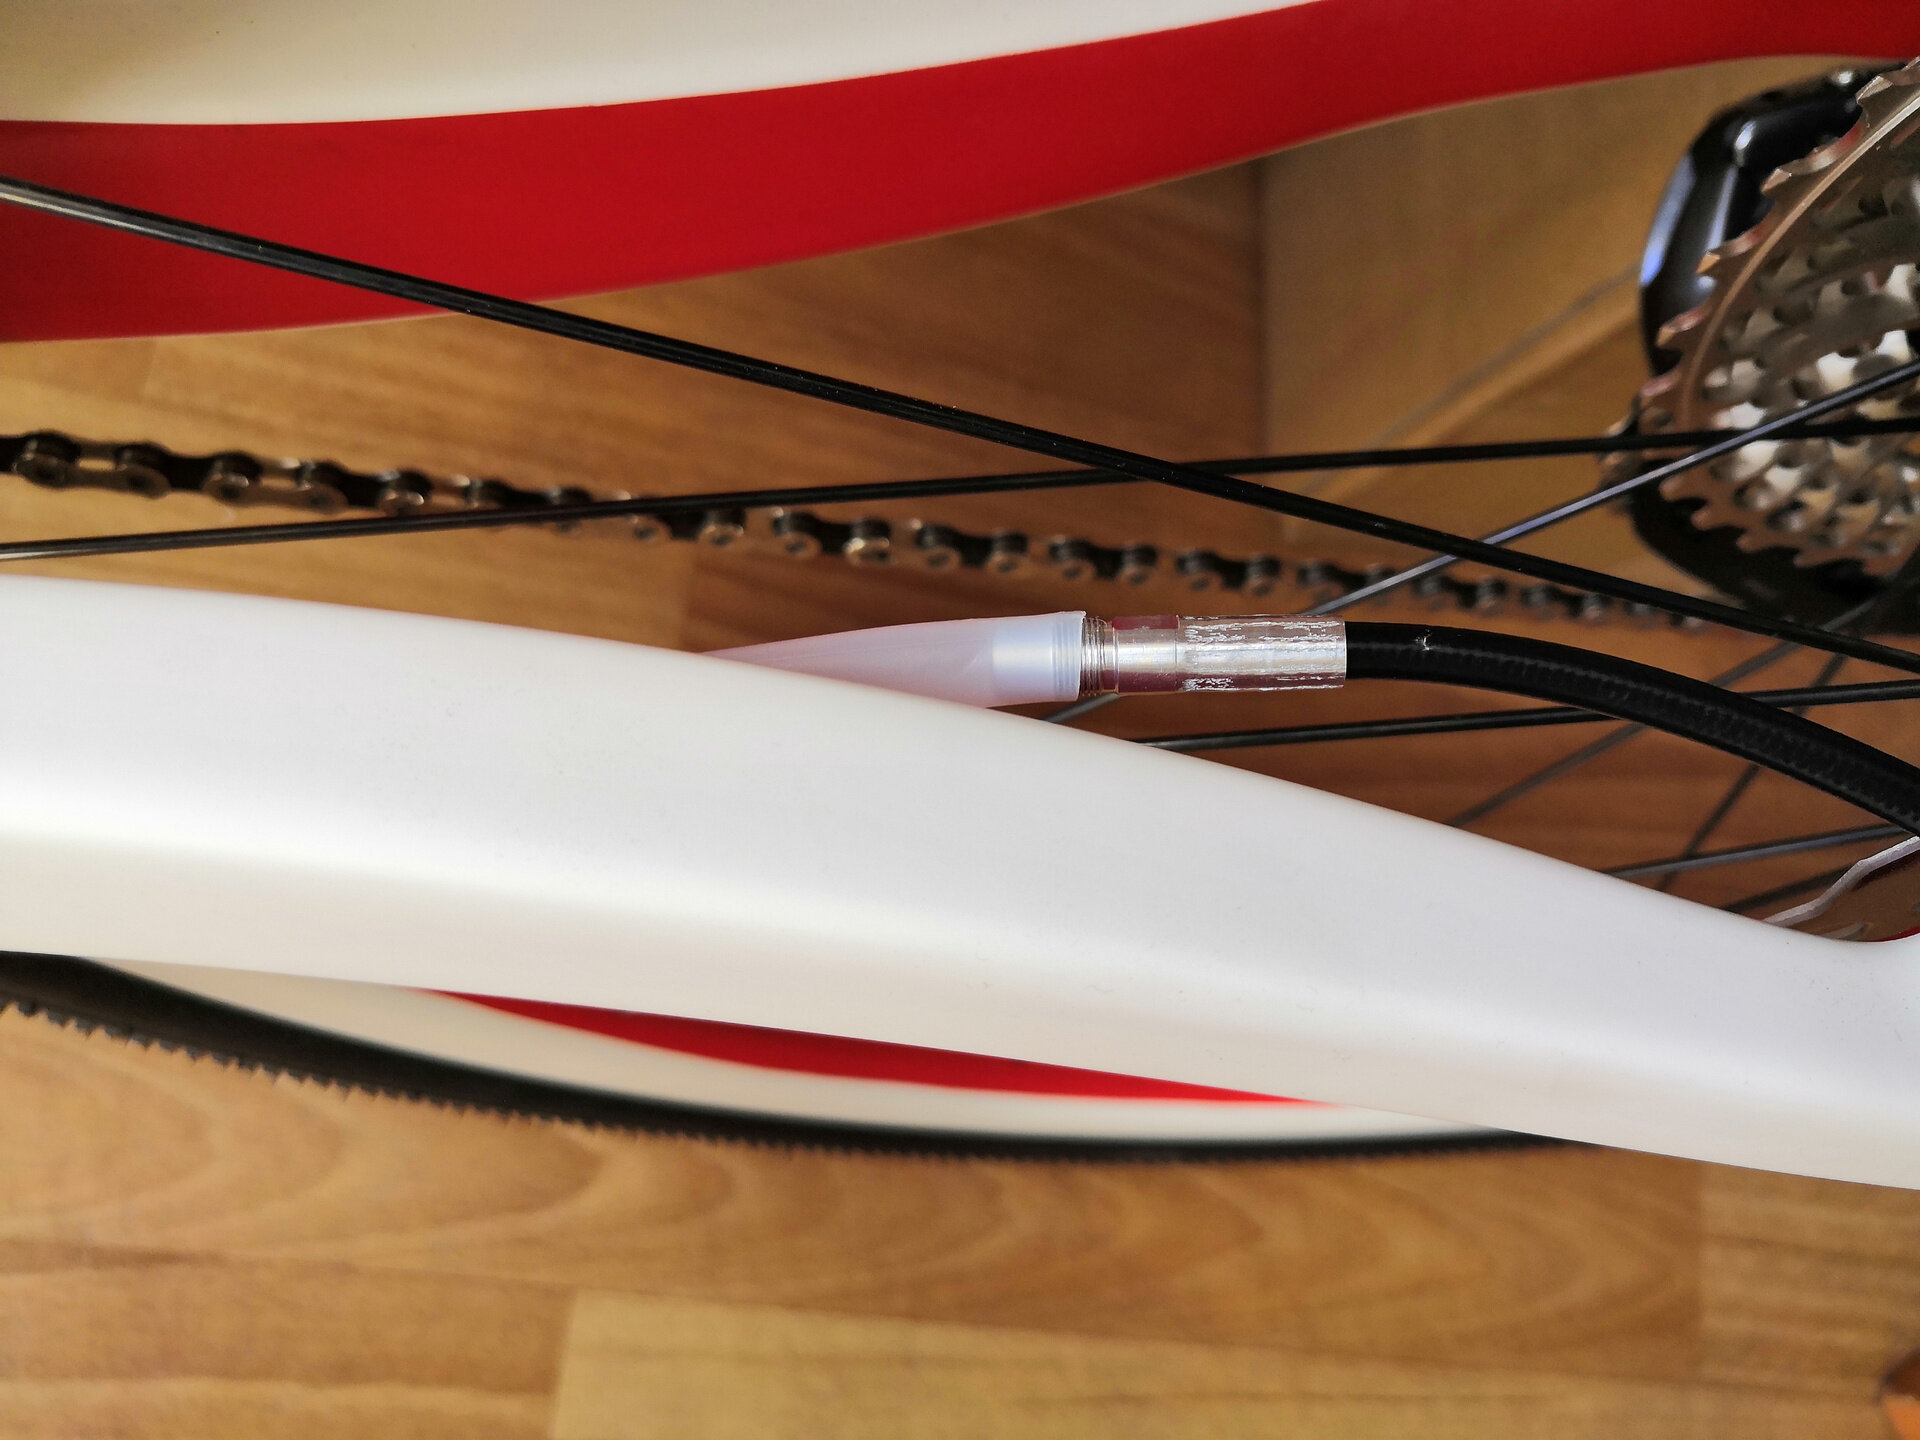


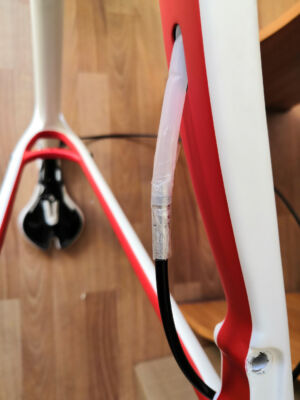
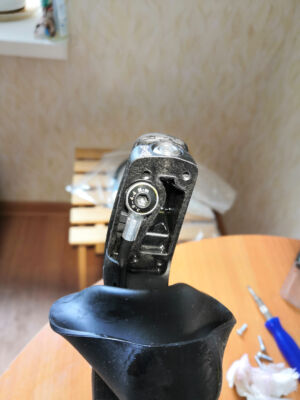
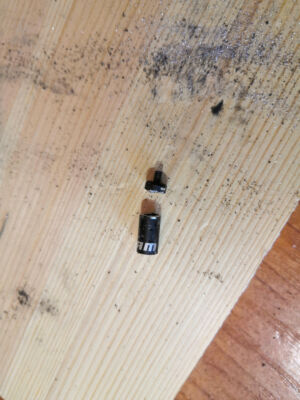
As a result, there is no way to route a hydraulic system for the rear brake inside the frame with this Sram gateway. I decided that I would put a regular hose, press it at the ends and attach it to the shifter and caliper. But for this, I need to detach the current hose from the caliper and shifter. I decided to start with the more difficult part, namely the shifter. I peeled back the hood of the shifter, removed the lid, oil immediately flowed out, no worries, it would still have to be bled. And I saw a complex-looking bolt in the form of a ring fastened with a bolt. This is the so-called banjo fitting. A piece of brake hose is connected to this fitting on one side and the gateway on the other. Moreover, this banjo bolt is connected to the end of the hydraulic line due to metal compression, that is, it is a one-time connection, it cannot be disassembled, and therefore this banjo bolt cannot be reused with another hose. The other end of the hose is connected to the gateway due to metal compression as well. So I had to cut the hose to pull it out of the shifter. I didn’t do it right away, I was worried by the fact that Sram banjo fitting is not sold anywhere, I didn’t find it in any online store. I decided to take the bike to a workshop so that they could do it all carefully, especially they know better where to look for parts, they probably can get the necessary fittings.

But before going to the workshop, all that remained was to route the cables and adjust derailleurs. The front brake works, that’s enough for riding.
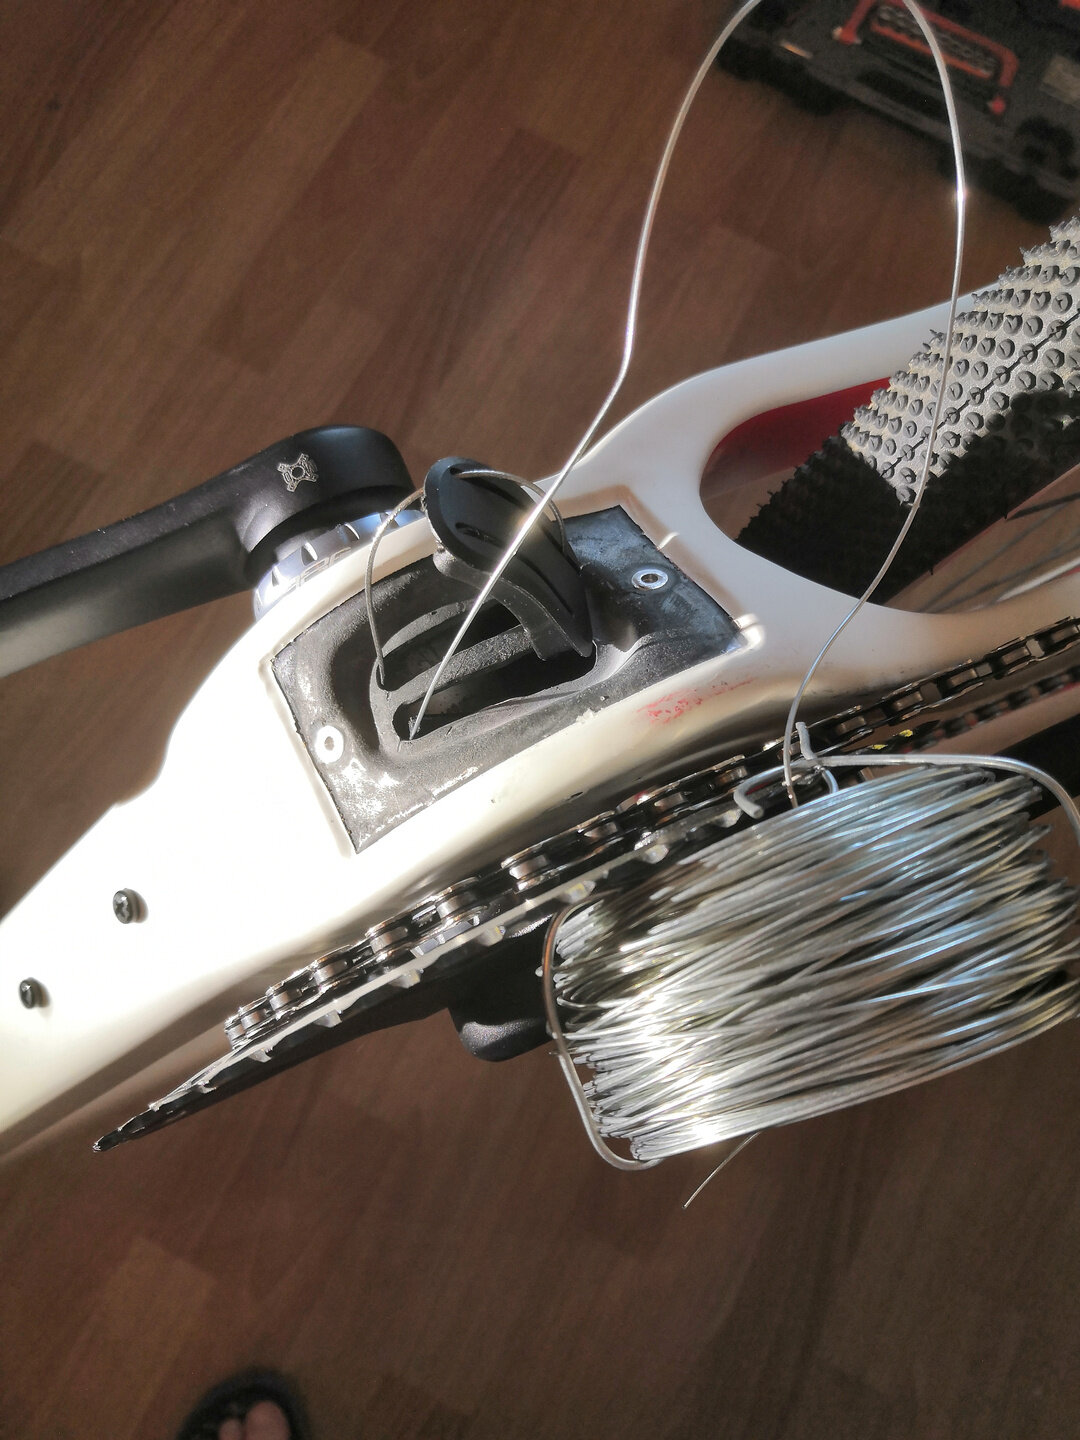
Cable routing
The frame allows the cables to be routed with or without housing. I decided to go the original way, without housing. This is a little more difficult as the housing needs to be cut into more pieces. It is unreal to cut the derailleur cable housing with ordinary pliers, and I don’t have special cutters. But there is a way how to do without them. I have described it here.
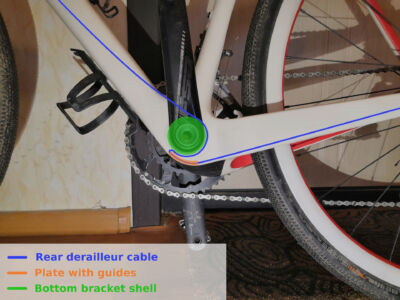
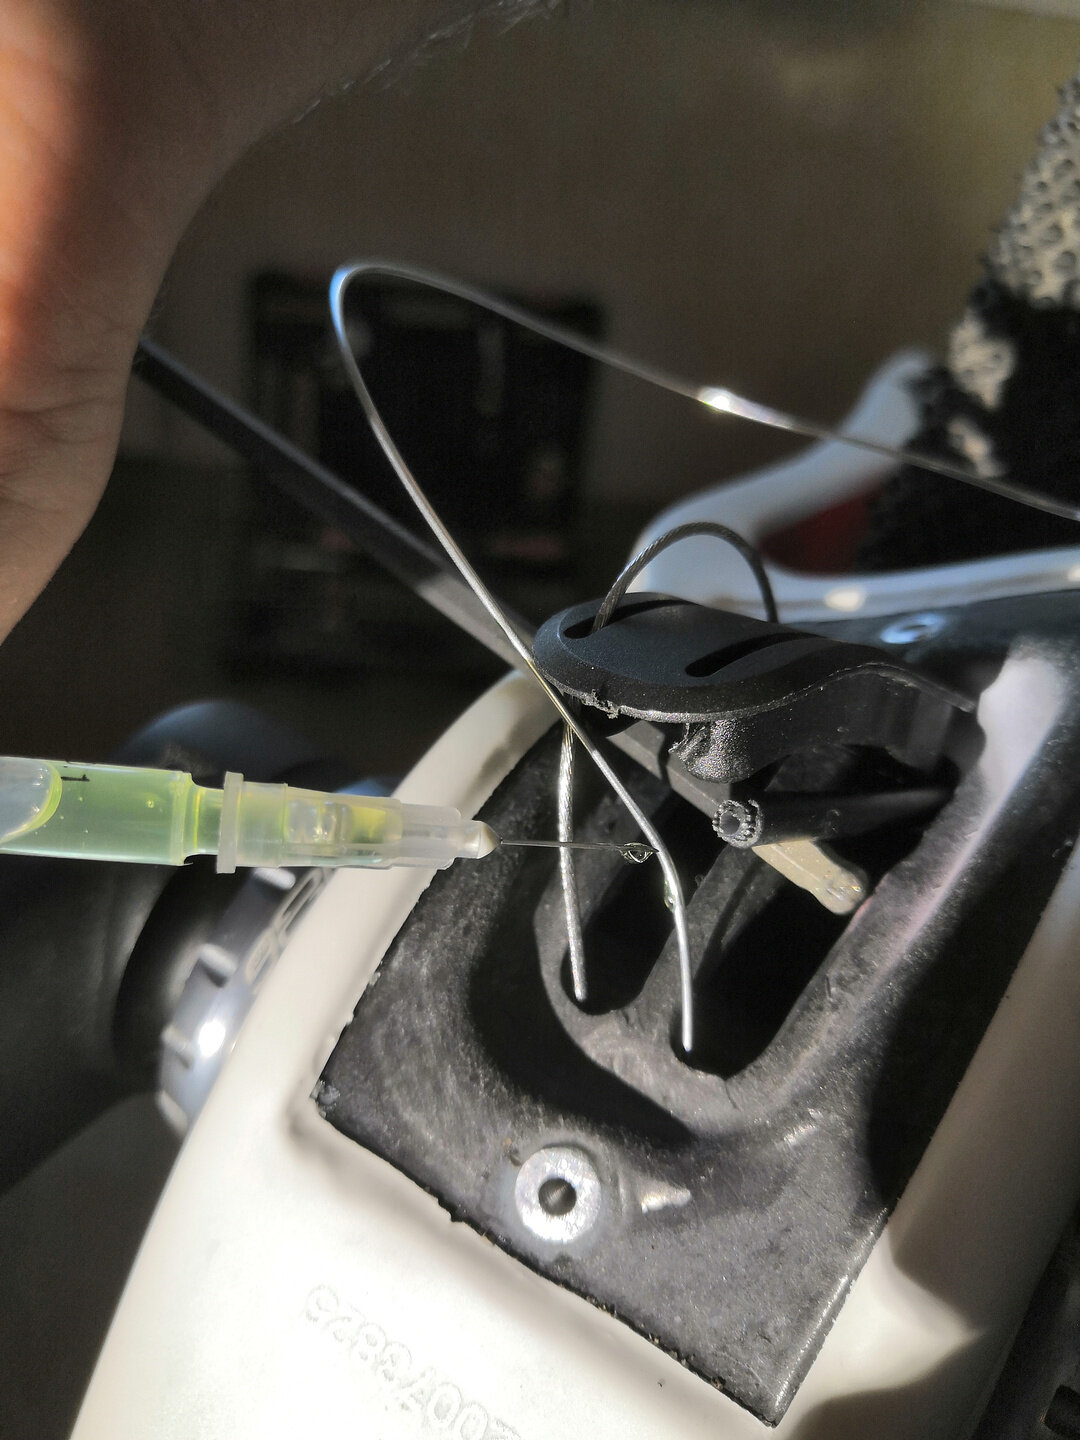
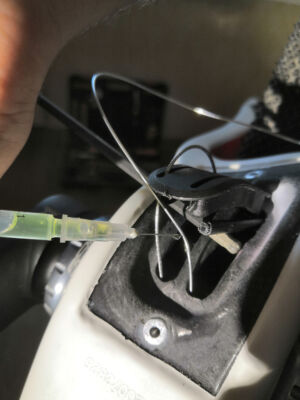
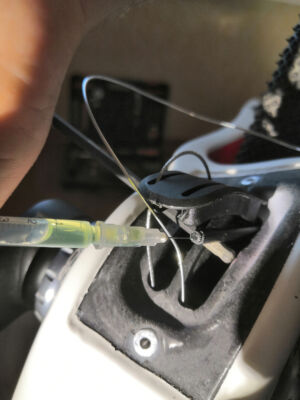
At the bottom of the bb shell, there is a removable plate with guides for the cables. It is needed in order to cables smoothly bend around the bb shell.
This frame has an oddity with the rear derailleur cable routing. I would even say this is a fault. At the end of the chainstay, where the cable should exit the frame, there is a long tapered cap. It has a thin channel, that is, inside the chainstay it is assumed that a cable enters into the cap, and from the outside, housing must be inserted into it.
But with this frame, it is a bad idea to run a bare cable into the chainstay. If you look into the hole at the bb shell, then inside the frame you can see that the transition from the bb shell to the chainstay inside has a sharp corner. Therefore, the cable will bend under strong tension through a sharp carbon corner. What will happen first: the cable will wear out or a groove in the carbon fiber will appear, in which the cable will get stuck – it is unclear, but both options are bad. And if you look at the plate with guides, the one that leads to the chainstay is supposed to be connected with housing.

Bad news is the cap at the end of the chainstay, which I described above, does not imply the routing of the housing inside the chainstay. And if I take the housing out of the frame without a cap, then there will be a huge gap, the outlet in the chainstay is much wider than housing. I had to do customization. I sawed off the tail of the cap, leaving just enough to it can hold in the hole, and bore the inner channel so that the housing would go through. So far so good! But it was originally supposed to insert a housing with a cap at the end into this chainstay cap, and in order to completely remove the gap, I also sawed the housing cap and put it on the housing. The end result was perfect 😌


Workshop service
One of the biggest problems with workshops is that many of them refuse difficult work. I decided to take the bike to the best workshop because I have a problem with a banjo fitting, which is not available anywhere. However, they refused me, referring to a huge queue for several weeks in advance. I chose another workshop, also widely known in my city, it is Chillen Grillen. Looking ahead, I don’t recommend using their services.
My bike is almost complete. Everything is done except for the rear hose and a handlebar tape. The tape can wait, it is not critical. I got on my bike and went to the workshop. It’s extremely unusual after MTB, but I’ll tell you about the experience of cycling later. Summer, the weather is good, I almost reached the workshop when the incidents began. I was riding across the bridge, there are bridge joints on the road, riding over one of them at speed, the compression plug flew out of the steerer tube. I forgot to tighten it 😬 And immediately a car went over it. To my surprise, there wasn’t a scratch on it. I put it into my backpack, the handlebar works fine without it.
I got off this bridge, stopped at a traffic light, and noticed that something was wrong with the spoke on the rear wheel. It turned out it got out from the nipple! Then I tensed, the bike began to fall apart 😨 I put the spoke into the backpack, the nipple fell into the rim and remained there. There was only one kilometer left to the workshop, and I decided to ride carefully along the sidewalk. There are 200 meters left, I was crossing the road along the underpass, rolling the bike in my hands, when heard a tink… Another spoke dropped! 😱
I very carefully rolled the bike to the workshop, explained the problem to a mechanic, and I had to order the reassembling of the wheels and the attaching the compression plug (although all that is needed is to tighten the bolt). I left my bike and went home as they need at least one day to get the job done.

The next day the mechanic called and said that they didn’t have a banjo fitting and that they couldn’t get one. It’s Sram’s feature to make a non-maintainable system. My opinion about the Sram brand decayed even further. But the mechanic said that he would try to cut the hose near the brake caliper, pull it through the frame and connect it back to the caliper. On the side of the caliper, thank God, the fittings were classic, with olive, as elsewhere. He also said that he had tightened spokes, that they were very loosely tightened. And he also cut the steerer tube smooth, as if this was a reason the compression plug flew out. I think this is complete crap, that this is an imposed service. The compression plug expands inside the steerer tube its entire length. And the compression plug cap doesn’t touch the edge of the steerer tube, it is pressed against the stem. So do not care how smooth a steerer tube is sawn off.
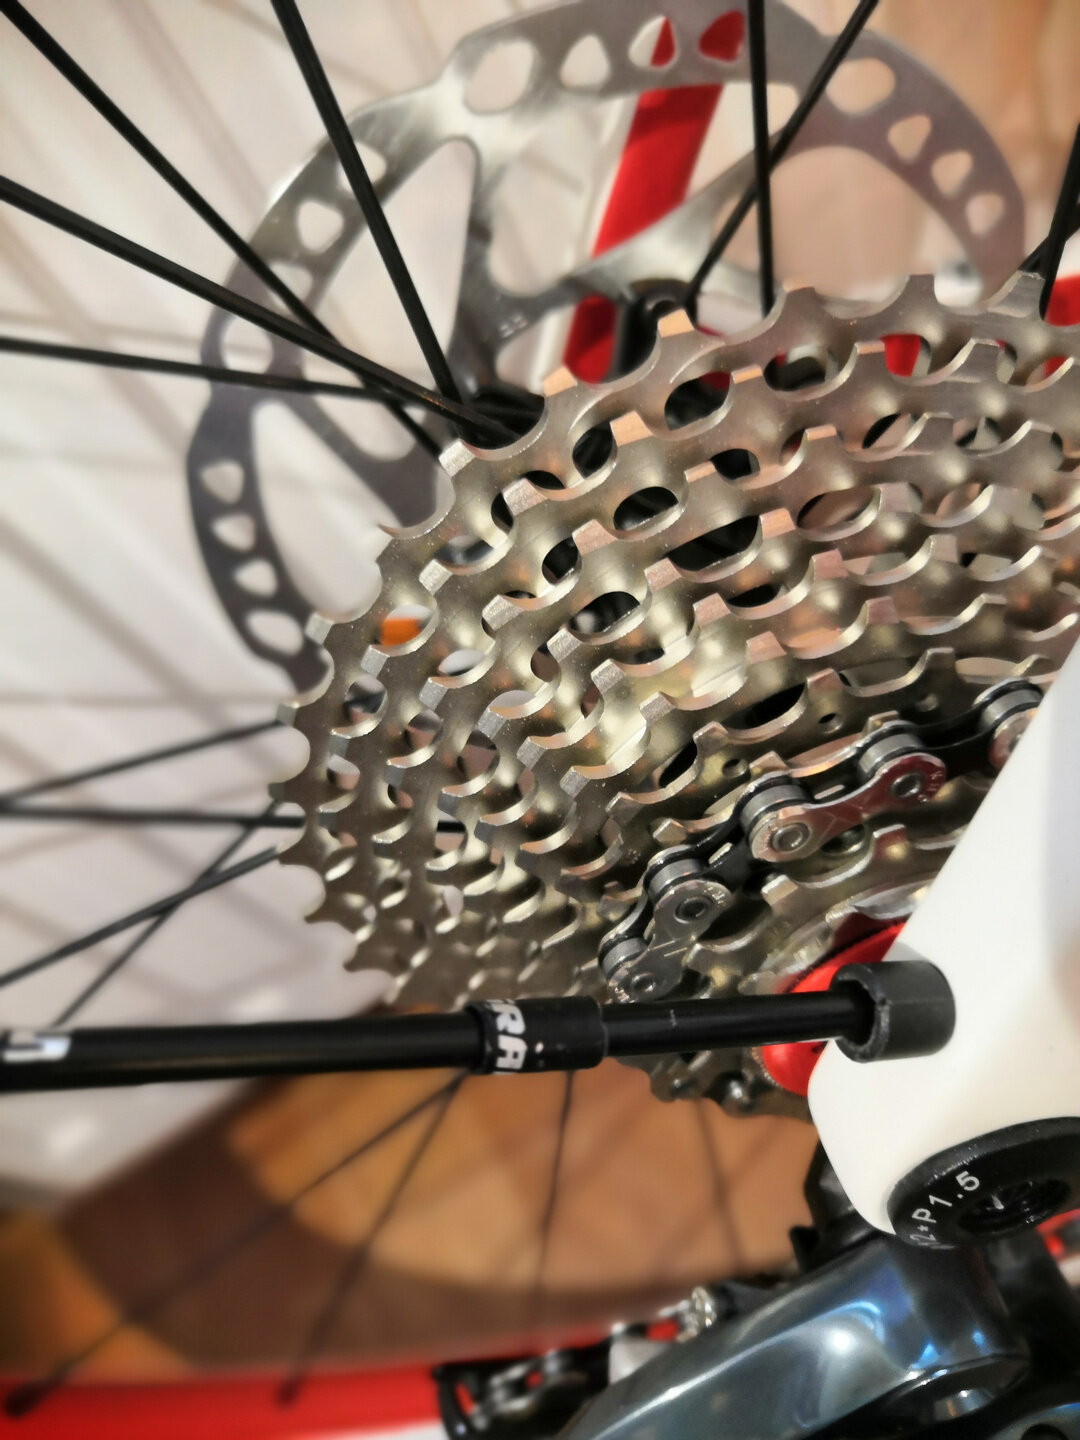
The next day, the mechanic called and said that everything was ready, the bike could be picked up. Grumbled that I bought a cheap bad cassette. In the evening of the same day, I visited the workshop and took the bike. The mechanic was gone. On the way home, I immediately noticed that the rear derailleur was poorly adjusted, I decided to adjust it at home, it was evening, I have no flashlight, so I didn’t want to waste time.
Bike repair after the workshop
At home, I tried to adjust the derailleur, but it didn’t work. Although I set it up before going to the workshop. I noticed that it does not work as it should, since the cable does not come out well. I had a similar situation on an old bicycle with worn out housing when the cable got stuck in the gap at the edge of the housing. But here everything is new and neatly cut! I thought that perhaps it was necessary to add grease into the housing, I did not do this, I thought that everything should work well anyway, but I read that some mechanics add grease to make the cable move easier.
I disassembled cables a bit, with a syringe injected grease into the housing near the handlebar first. Then I unscrewed the lid under the bb shell, began to loosen the cables there and I realized that something was wrong. I have no decent words to describe what I’ve seen there. The mechanic messed up so that I had to re-route the cables.


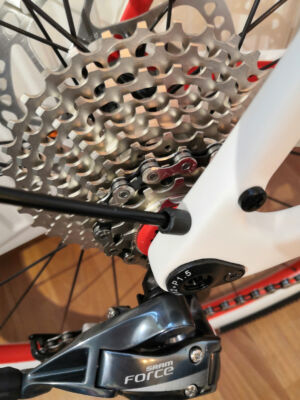
He routed the cable above the bottom bracket, not under it. It turned out that the cable made an almost complete loop around the bottom bracket, and then entered the plate with guides at an acute angle. Then it became clear why the cable was moving so bad. The “cheap” cassette had nothing to do with it.
In fact, I had to wrap the cable around the bottom bracket, but I missed it with the hook, and it fell into the frame. I spent a lot of time trying to catch it. In the end, I just pushed the wire through the entire frame, it was easier to push it in than a flexible cable. I tied a cable to the end of the wire and pulled it out. Finished assembling and adjusted the derailleur with no problem.


As a result, I have mixed feelings about the service of this workshop. On the one hand, they tightened spokes and routed a hydraulic hose despite there was a difficult situation with it. Although for some reason the brake hose was left inside the guide tube, I would have pulled the tube out, but this is a trifle. The rubber sleeve was not yet put on at the place of connection to the caliper, although I brought it. On the other hand, the cable routing was essentially broken, which made it impossible to operate the bike normally. And they returned the dirty bike, all stained, I left it clean. The work cost me 110$. I will definitely not recommend workshop Chillen Grillen to anyone.
After the transmission was ready, there were a couple of finishing touches left: reel up a tape around the handlebar and attach chainstay protection.
Conclusion
In my opinion, there is only one tricky thing about assembling a bicycle: wheel lacing. And installing tubeless tires requires something more powerful than a regular pump. In the rest, assembling a bike is a fairly simple thing if all the parts are of high quality, without any peculiarities. Not everything went smoothly for me, so I wasted a lot of time. But in the end, the bike is assembled and ready for use.
Now I think that my thoughts about the choice of components (I described this in previous articles) were wrong. Most of all, my opinion has changed about the Sram brand, such vile marketing as their are hard to find, extremely non-repairable components. And in the case of in-frame cabling like mine, it is impossible to install this system without reworks. Of course, the hydraulic systems are very reliable, my friends and I have ridden a lot of trips on bicycles with hydraulics, no failures or complaints. But nevertheless, if at least something happens with this new hydraulic system, then the entire system will have to be changed, it is impossible to replace only the broken part (exсept some bolts or a lever on the shifters).
Last but not least, assembling a bike from scratch is a big mistake if you’ve never ridden this type of bike before. In general, there is nothing wrong with self-assembly (apart from the lack of parts on the market), but for this, you need to have enough experience in riding a bike of this type. This will significantly reduce the number of mistakes made, which is equivalent to saving budget and time.
Will I be assembling bikes again? Perhaps 😏 I am thinking about assembling a new MTB, I have already traveled a lot in mine, I know what I would like to change. But I won’t do it soon, I need to take a break from working as a mechanic 😄